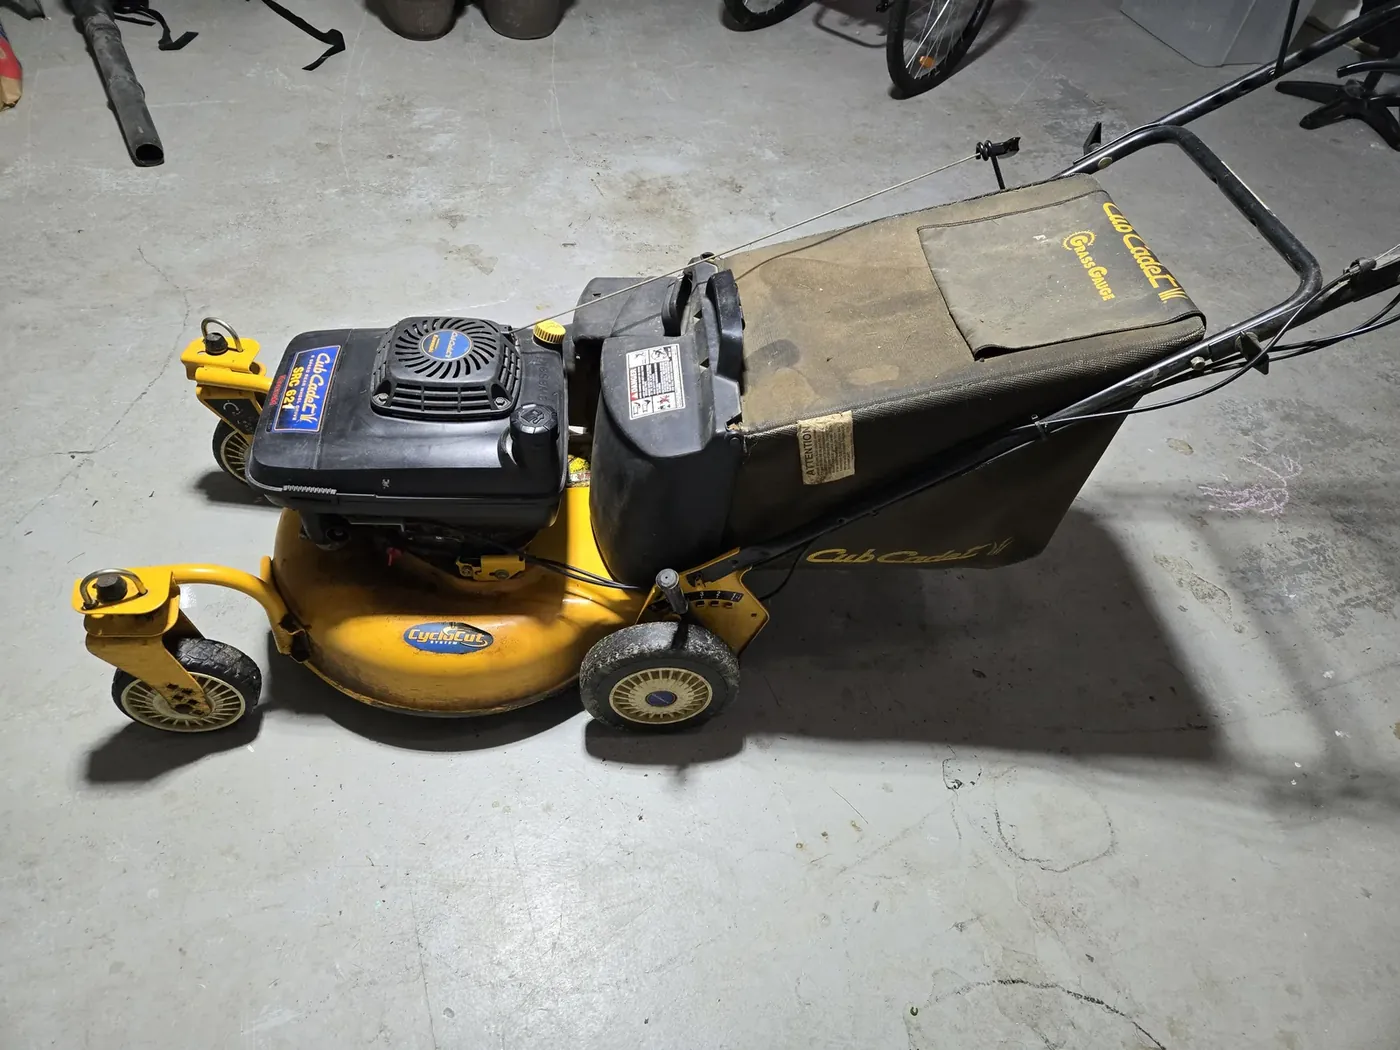
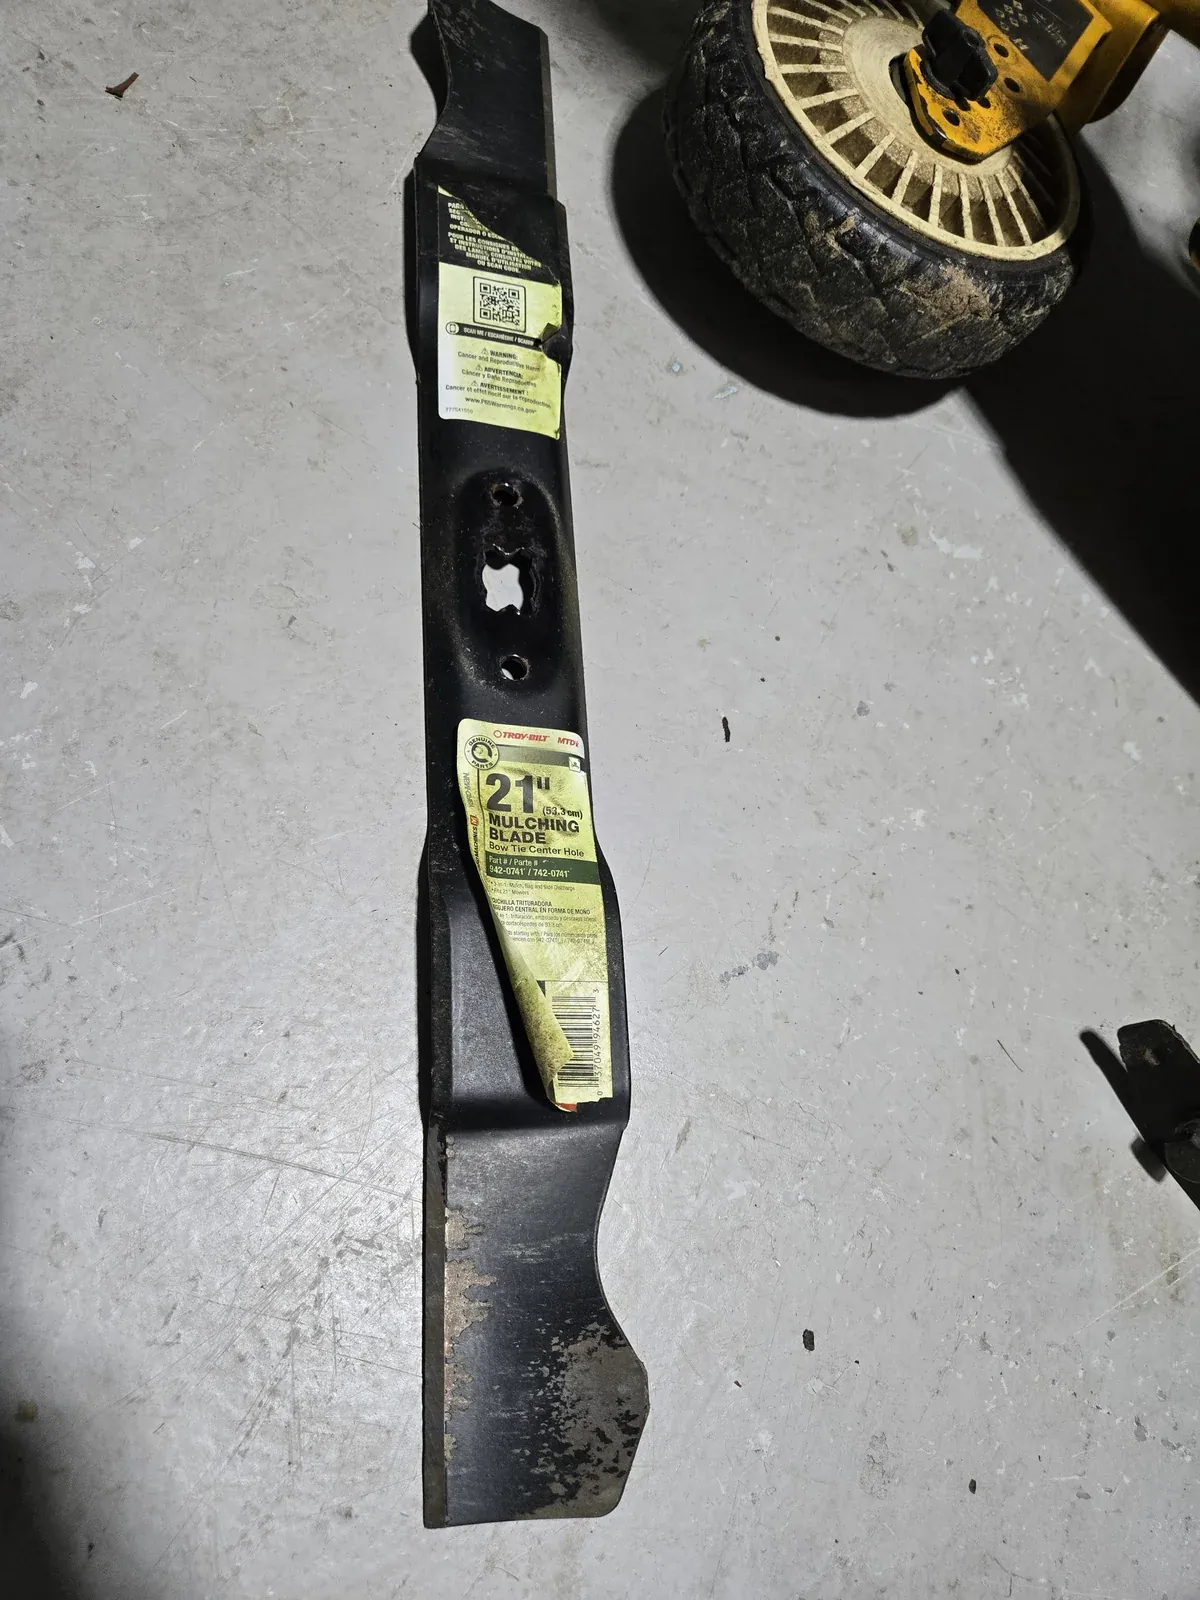
A dull mower blade doesn’t cut grass — it tears it. You can see it the next morning: every blade tip frayed and going brown, the lawn looking tired two days after you mowed. I did the full spring tune-up on my Cub Cadet SRC621 earlier this year and replaced the blade outright because the old one had chunks missing from a winter of pine cones. One season later, that new blade — it still has the parts label on it — is dull, and this time it gets sharpened, not replaced.
This is how I do it with a cordless angle grinder and a flap disc: off the mower, clamped in a vise, following the factory bevel, kept cool, balanced on a nail, and bolted back on. Start to finish the whole job took me about 20 minutes, and most of that is setup and cleanup — the actual grinding is a couple minutes per end.
When a Blade Needs Sharpening (and When It Needs Replacing)
Sharpen when:
- Grass tips look torn and turn brown a day after mowing instead of clean-cut
- The cut is uneven or the mower bogs down in grass it used to handle
- You’ve hit something — roots, a rock, a pine cone — and the edge has small dings
- It’s been 20–25 hours of mowing, or about half a season
Replace instead when:
- Nicks are deeper than about 1/8 inch (sharpening that far back leaves the blade unbalanced and thin)
- The blade is bent — sight down the cutting edge, or lay it on a flat surface and look for rock
- The lift wing at the trailing edge is worn thin or cracked
- It’s already been sharpened three or four times and is visibly narrower than new
Mine this spring was a replace: the old edge had visible chunks missing. This time it’s the one-season-old Troy-Bilt 21” mulching blade I put on in April — the edge is just rounded over with a few small dings from whatever the yard threw at it. A sharpening job.
What You’ll Need
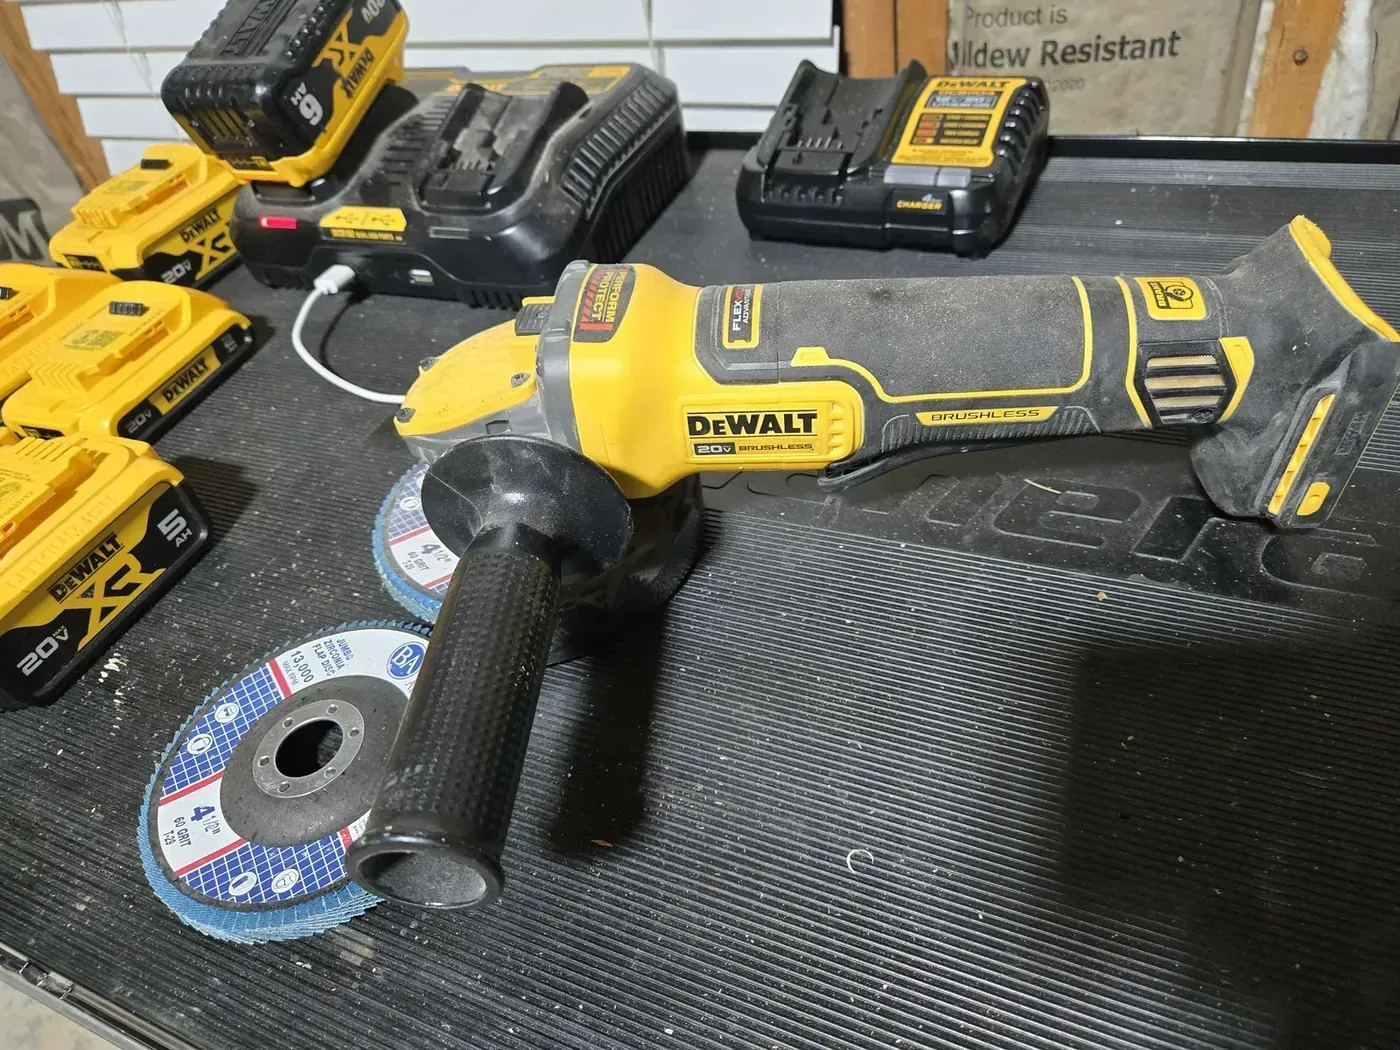
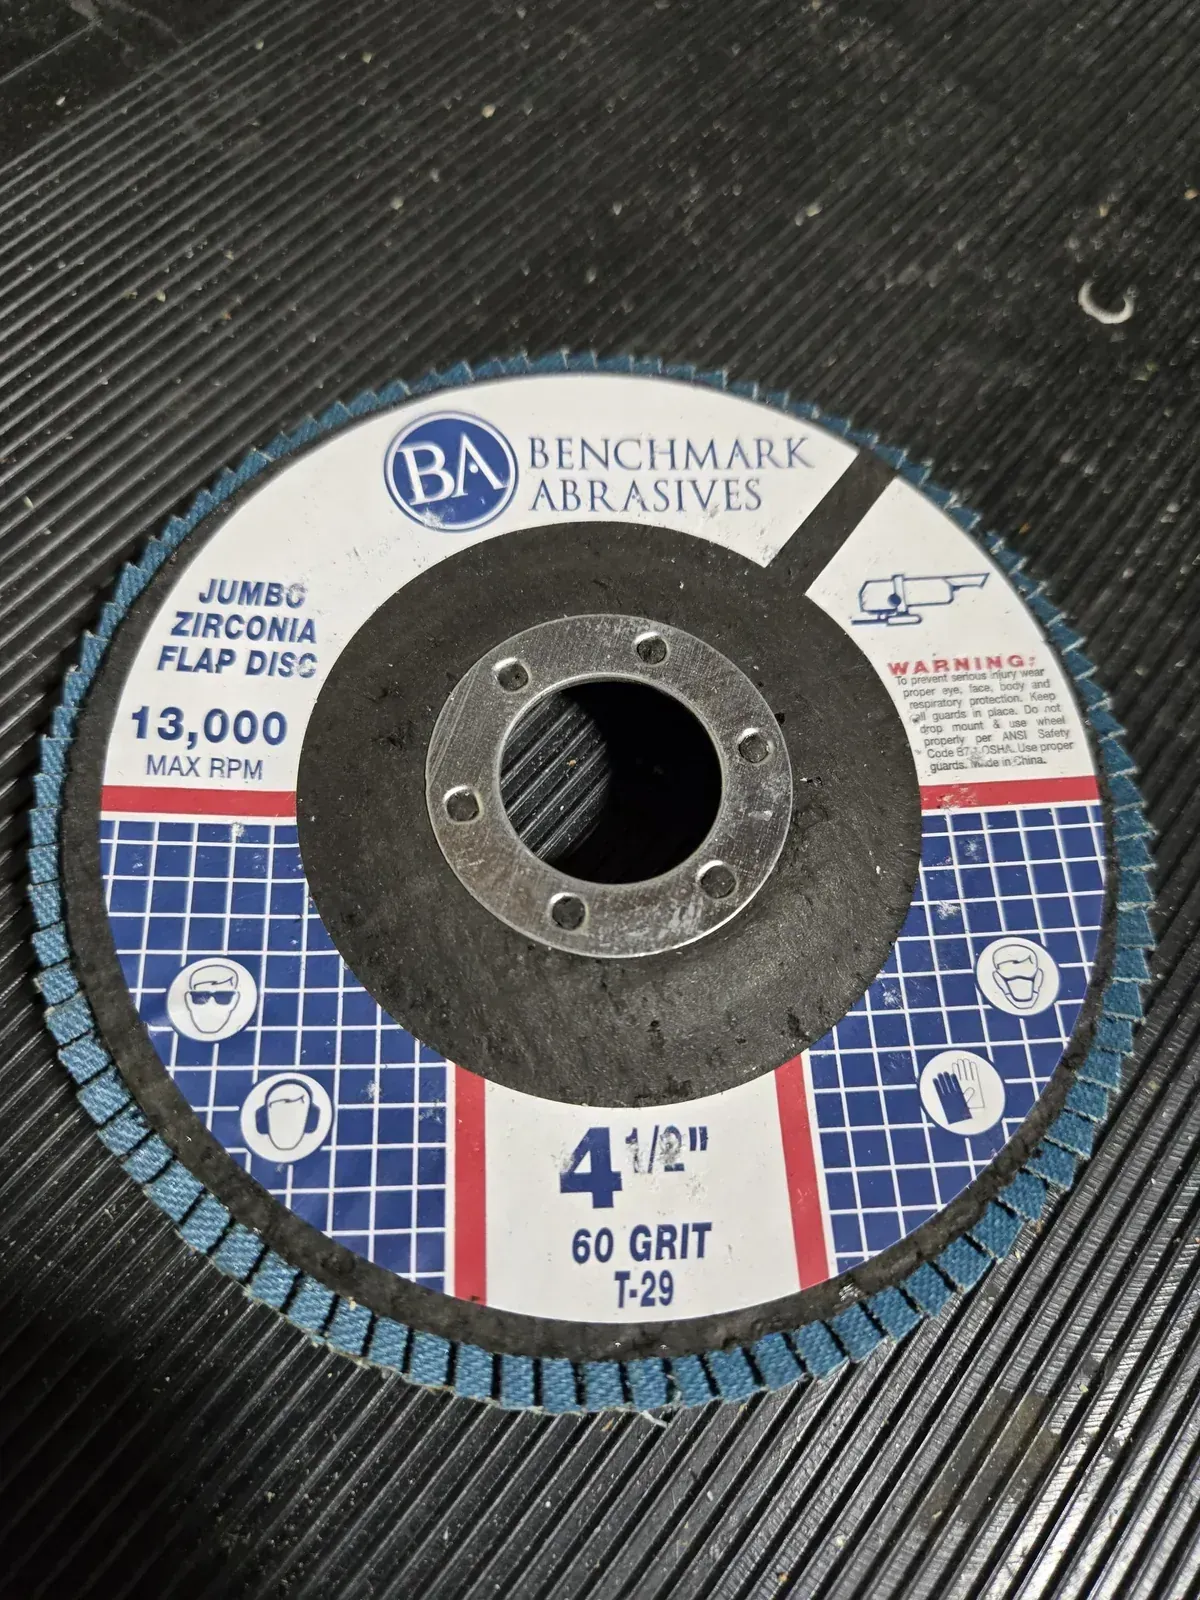
- Angle grinder with a 4-1/2 inch zirconia flap disc — 60 grit for a normal touch-up, 40 grit if there are nicks
- A bench vise bolted to something solid — the blade must be clamped, never hand-held
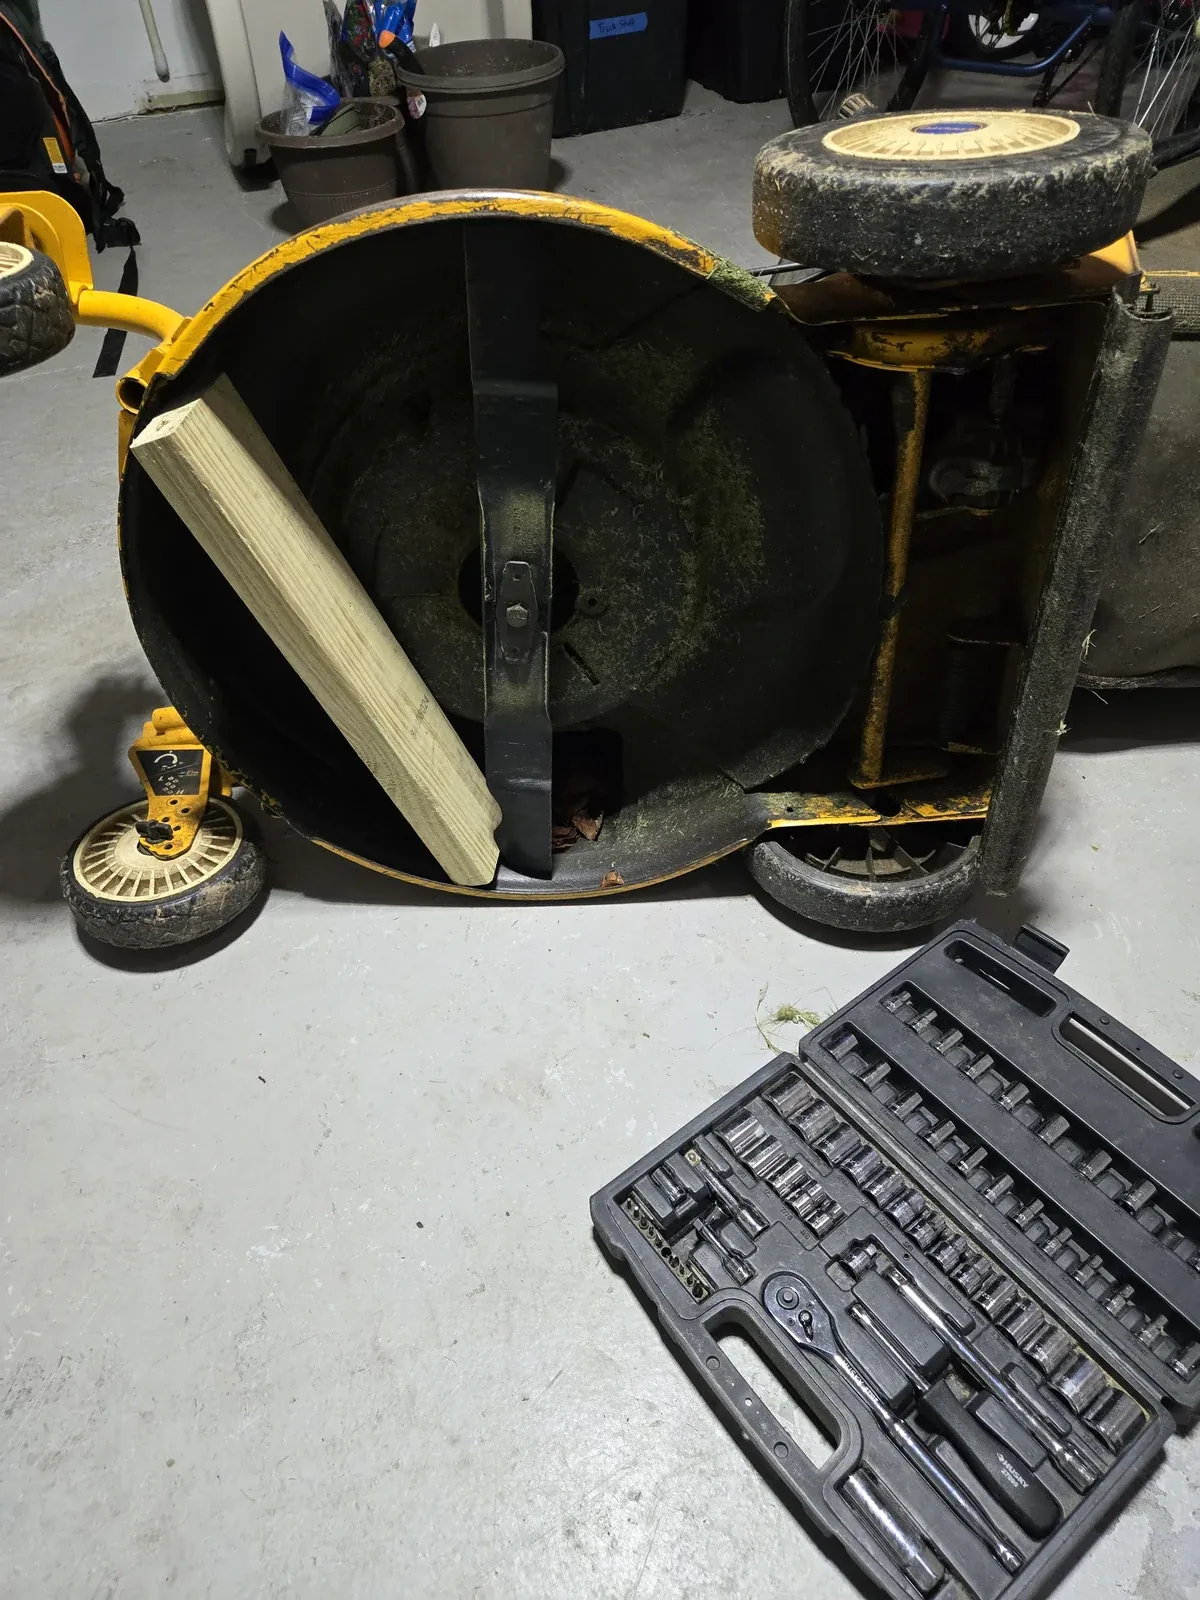
- A socket set with a ratchet for the blade bolt (mine broke free with a standard 3/8” ratchet — a breaker bar is the escalation if yours is rusted on)
- A scrap 2x4 to block the blade
- A plastic sandwich bag for the gas cap (trust me — see step 1)
- A nail in a wall stud for the balance check
- Safety glasses and gloves — a flap disc throws hot zirconia grit and steel, and the edge you’re about to grind will open your hand
- A bucket of water to cool the steel, and a rag
Safety First — This Is the Part People Skip
Two things on this job can hurt you badly: the engine and the grinder.
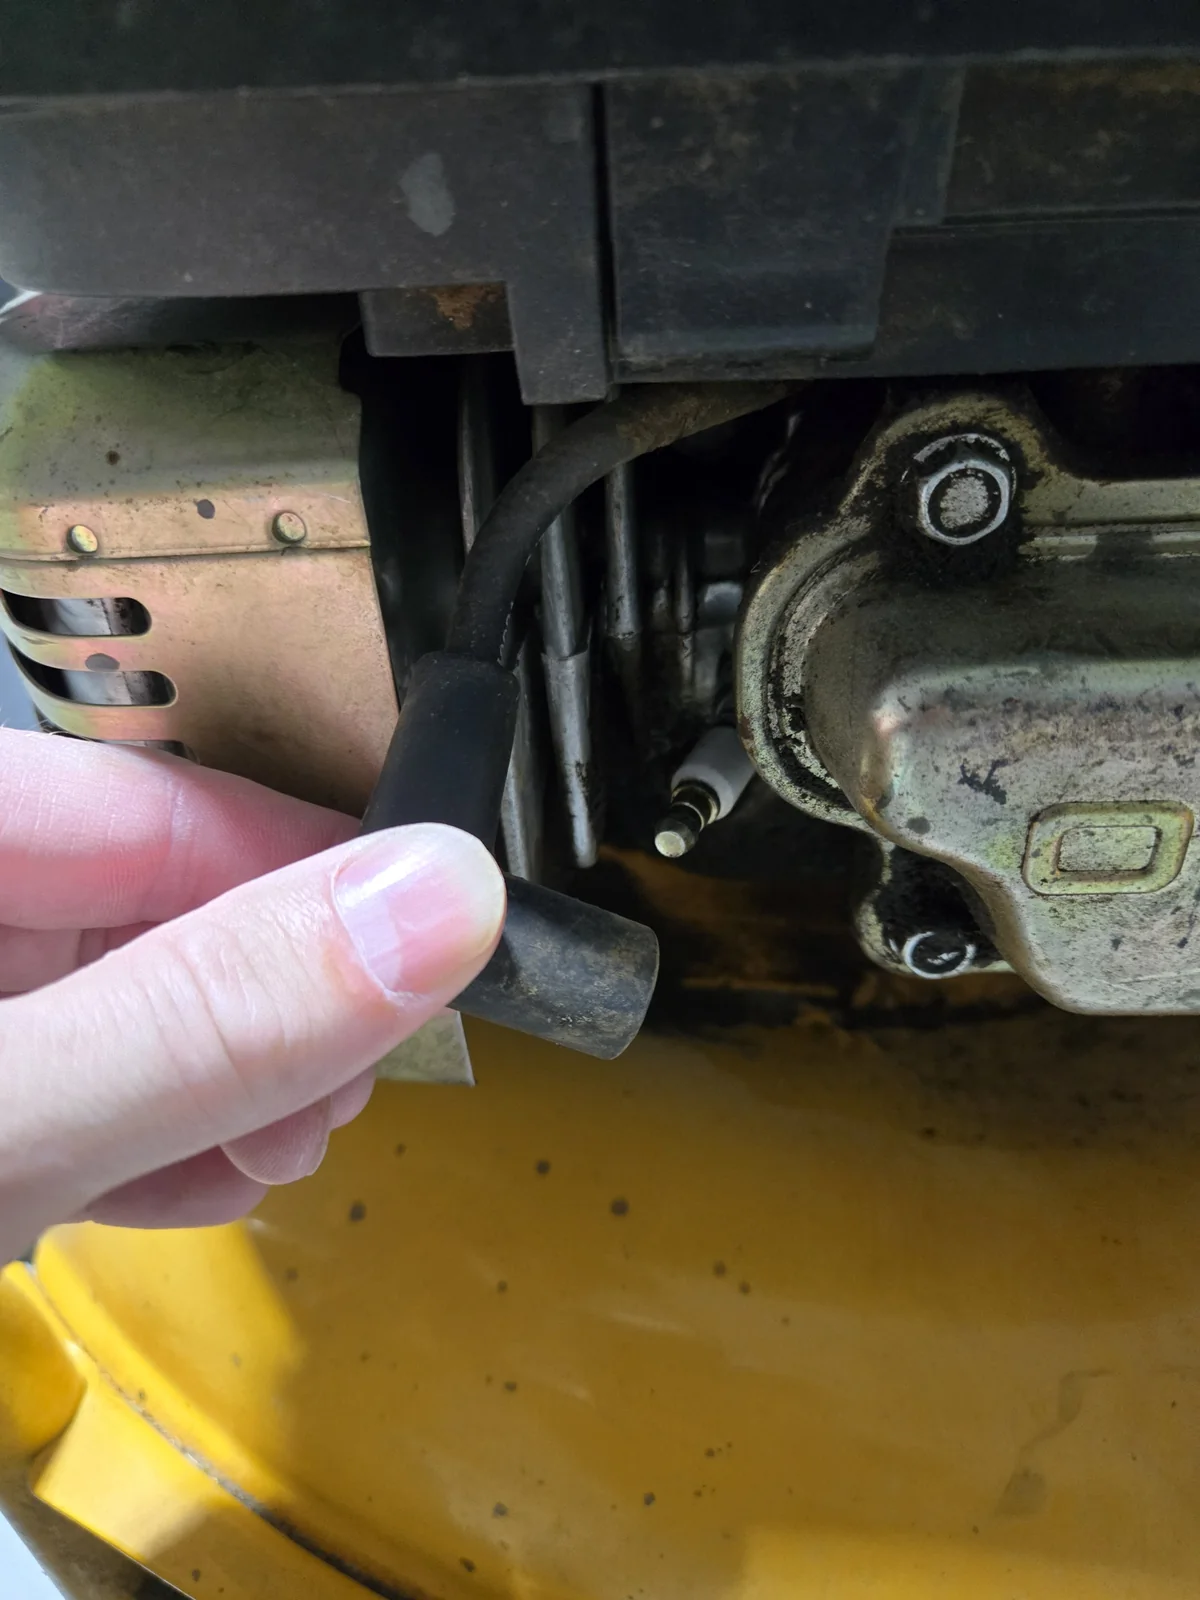
Disconnect the spark plug wire before you touch the blade. Pull the boot off the plug and tuck it away from the plug. Turning the blade by hand can turn the engine over, and a mower that fires while your hand is under the deck is how people lose fingers. This takes five seconds and it’s not optional.
Grinder rules: guard on, disc rated for the grinder’s RPM (any standard 4-1/2 inch flap disc is), both hands on the tool, sparks directed away from you and away from anything flammable — which includes the mower’s gas tank, so do this at the bench, not next to the mower. Glasses on the whole time. The blade is clamped in a vise; you never hold the blade and grind, and you never hold the grinder still and move the blade.
Step 1: Get the Blade Off
- Disconnect the spark plug wire (see above).
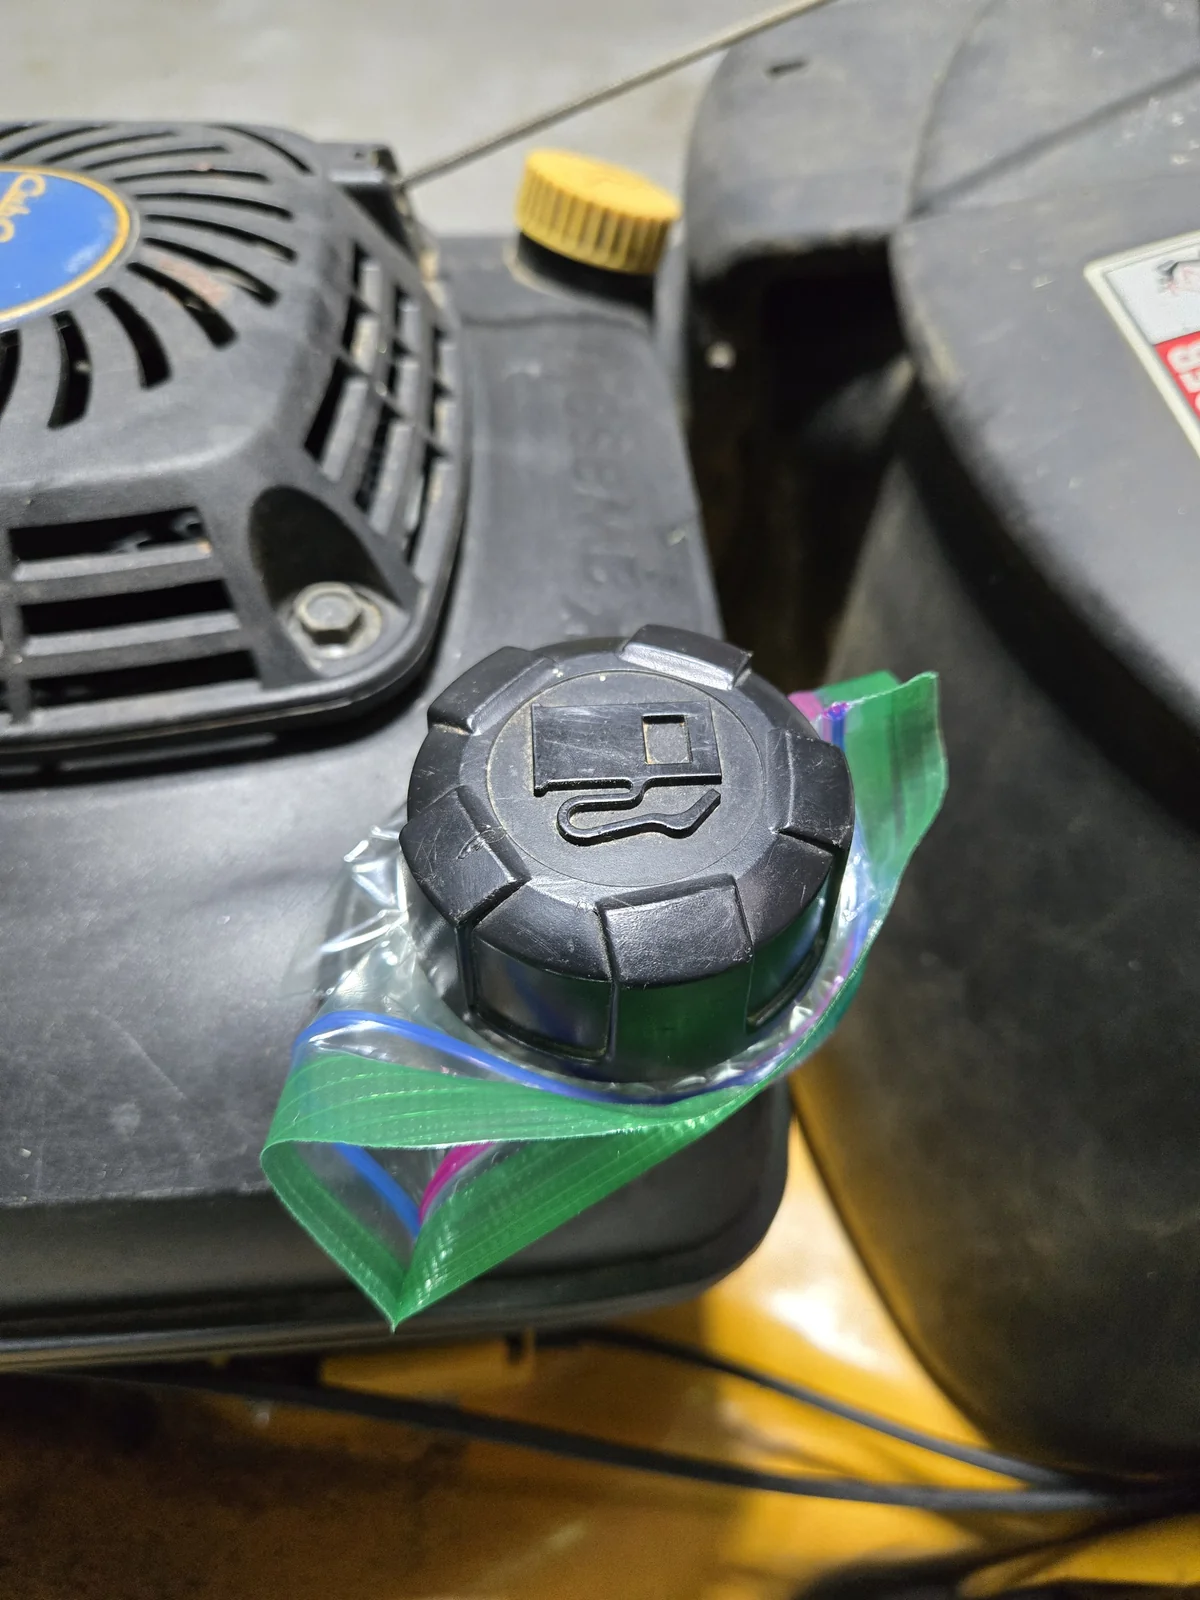
- Bag the gas cap. Unless the tank is bone dry, tipping the mower will seep gas past the cap vent. My fix: take the cap off, lay a plastic sandwich bag flat over the opening, and screw the cap back on over it. The bag seals the vent and nothing leaks while the mower’s on its side. Pull it back off when you’re done — the tank needs that vent to run.
- Tip the mower with the air filter and carburetor side up. Tip it the wrong way and oil runs into the air filter — it’s a mess and it smokes for ten minutes next time you start it. If you’re not sure which side, the air filter housing is the plastic box on the side of the engine; that side goes up.
- Wedge the scrap 2x4 between the blade and the deck on the discharge side so the blade can’t spin when you crank on the bolt.
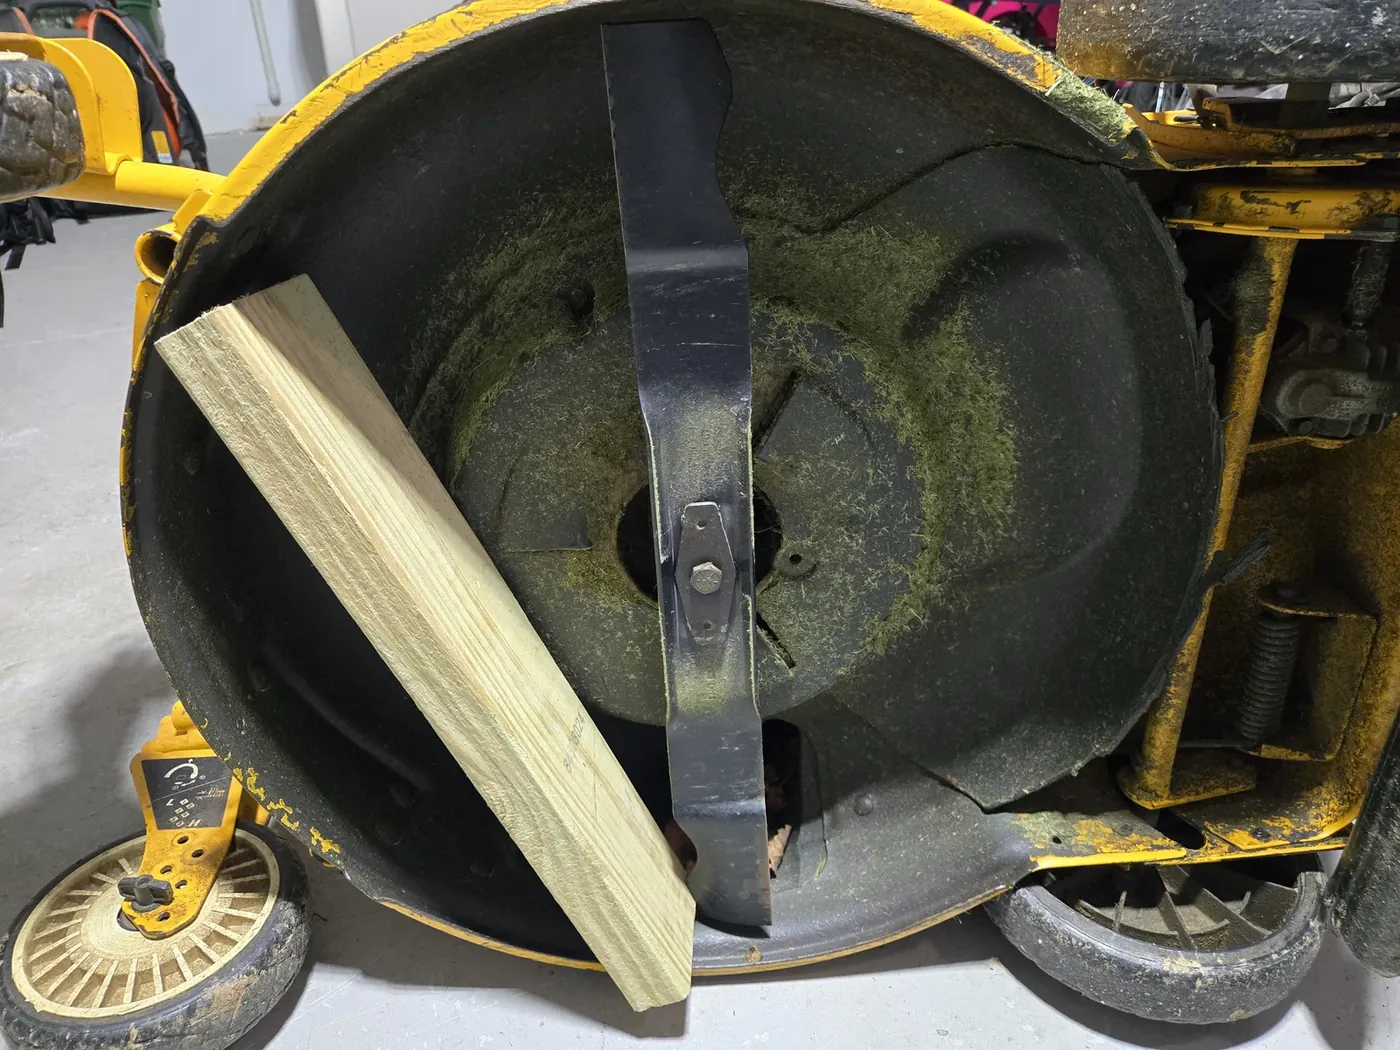
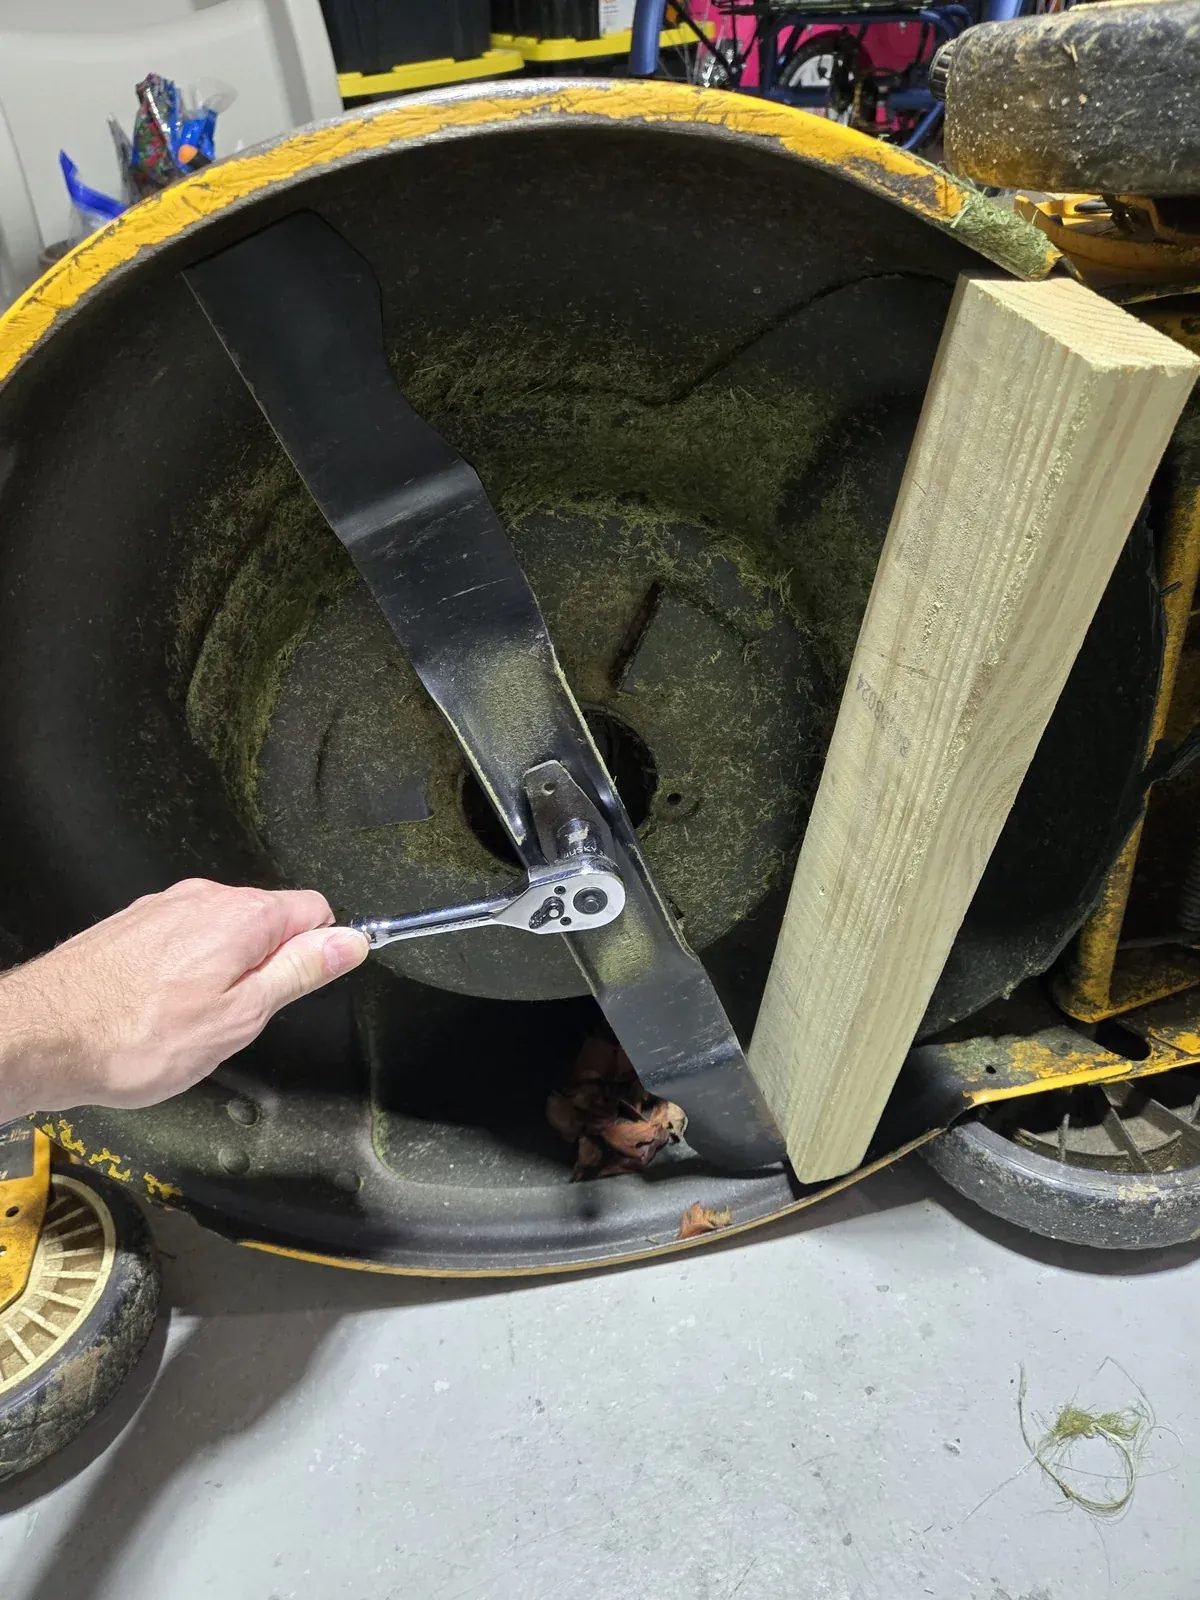
- Break the bolt loose. Almost every walk-behind mower uses a standard right-hand thread — counterclockwise to loosen. On the SRC621 it’s a 5/8” socket, and mine broke free with a regular ratchet braced against the 2x4. If yours has more seasons of rust on it, a breaker bar or a shot of penetrating oil and ten minutes of patience beats rounding the bolt.
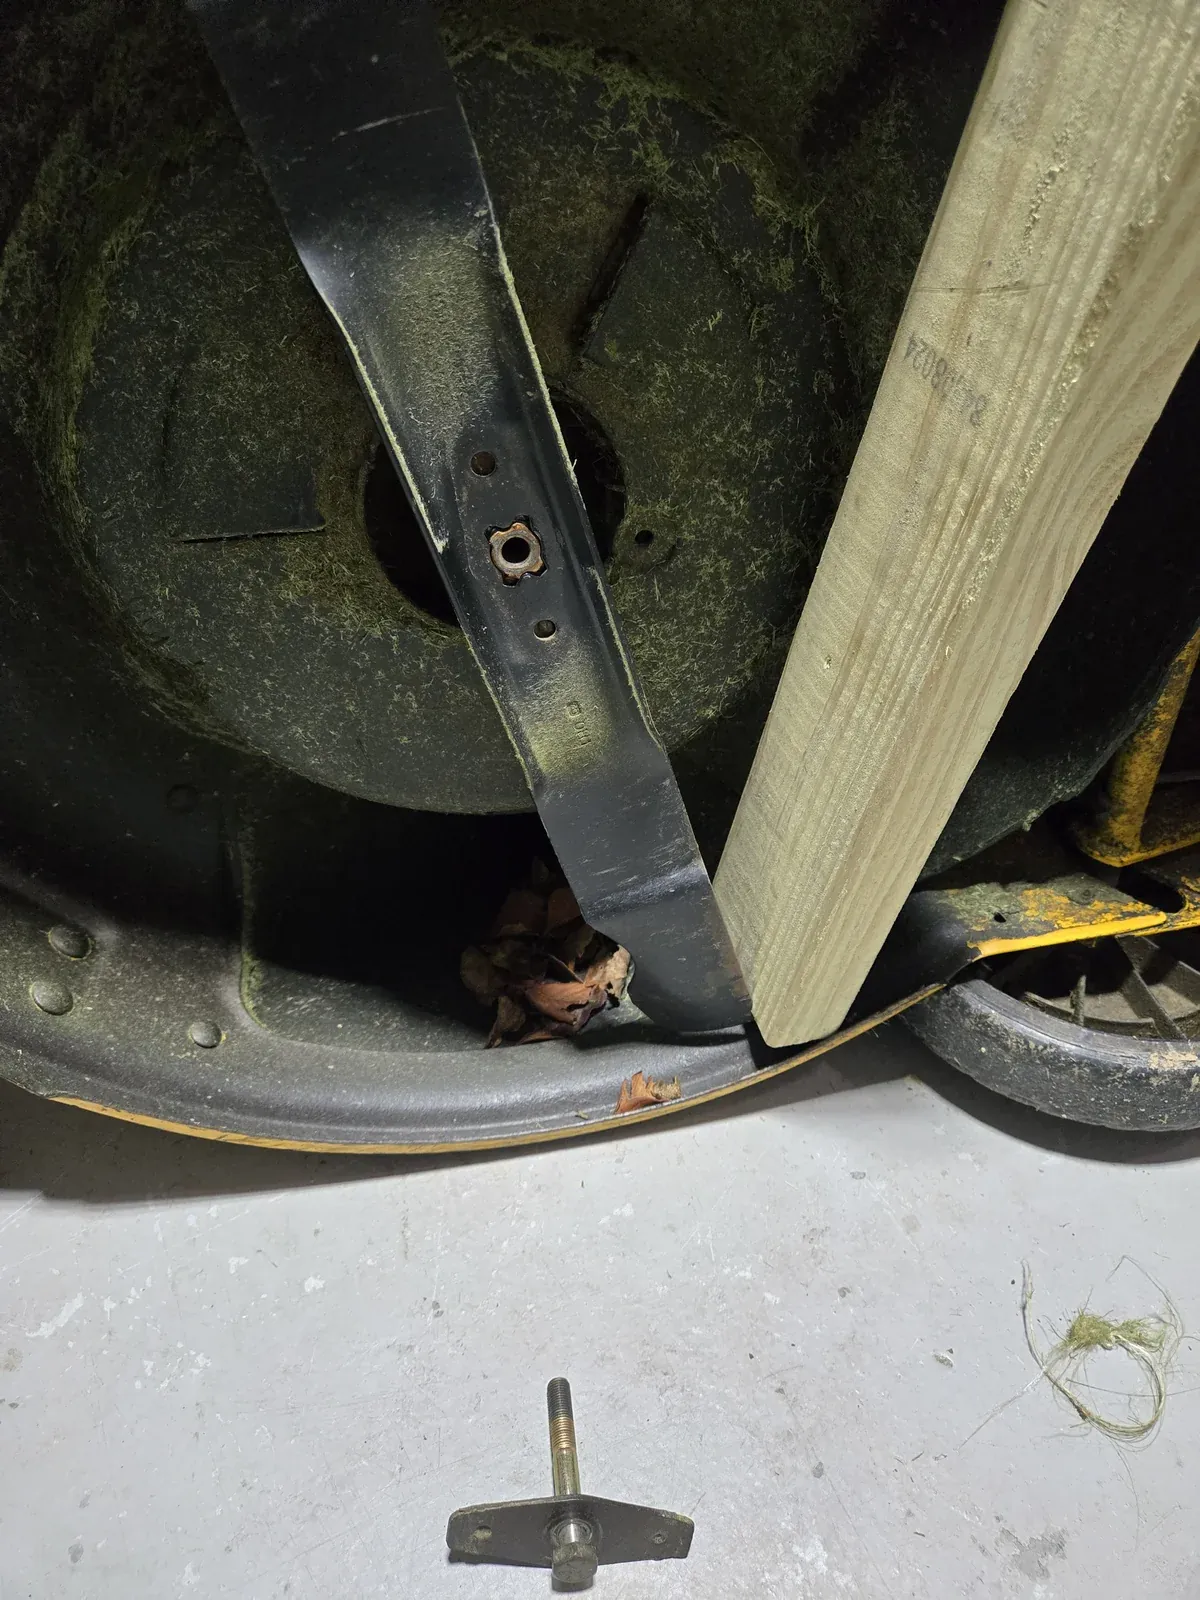
- Photograph the blade before you pull it. Seriously. The blade has a top and a bottom, and putting it back upside down is the most common mistake in this whole job — the mower either won’t cut or throws grass everywhere. Note which way the cutting edges face relative to the discharge chute.
- Pull the bolt, the bow-tie retainer washer, and the blade. Wipe the grass off the spindle while you’re in there.
Step 2: Inspect It Honestly
With the blade off, check it against the replace-list above. Lay it on the bench: a bent blade rocks. Sight down the cutting edge for a bow. Look at the lift wings for thinning or cracks. If it fails any of those, stop here and order a blade — a bent or cracked blade can come apart at 3,000 rpm, and no amount of sharpening fixes that.
Mine passed: straight, wings intact, just a rounded-over edge with light dings. It’s the 21” MTD/Troy-Bilt mulching blade (part 942-0741) that fits the SRC621’s bow-tie center hole.
Step 3: Clamp It and Sharpen One End
Clamp the blade in the vise with one cutting edge up and the beveled side facing you. Tighten the vise hard — the grinder will try to move it.
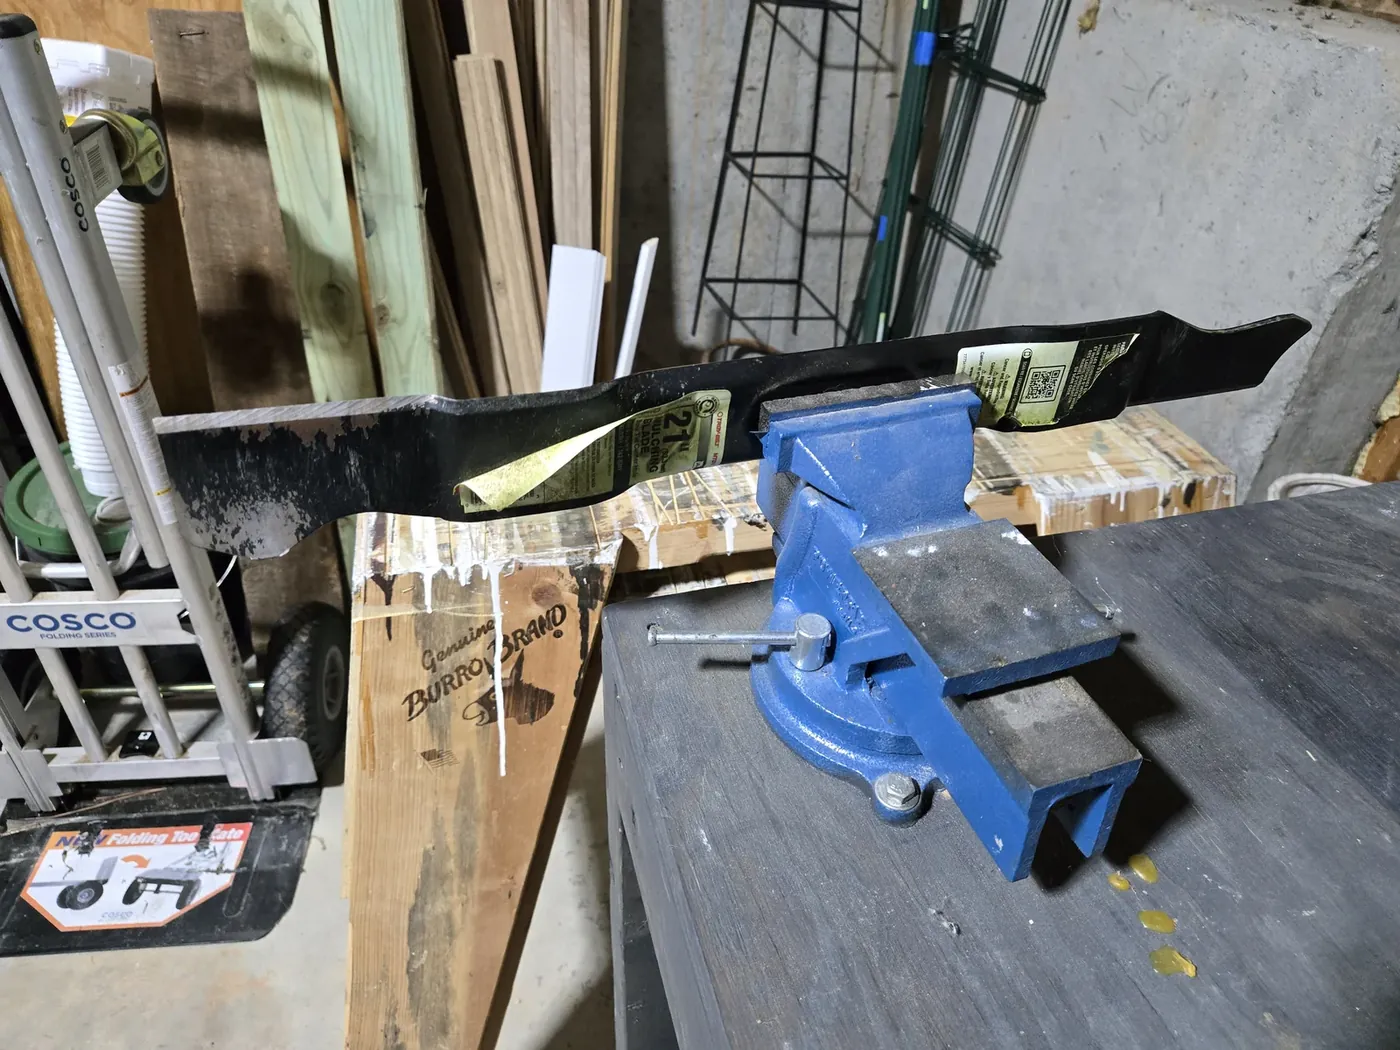
Look at the existing bevel. That’s your angle. On most blades it’s about 30 degrees; you’re not picking an angle, you’re following the one the factory ground.
Now, with a 60-grit flap disc on the grinder:
- Let the grinder come up to full speed before it touches steel.
- Lay the flap disc flat against the existing bevel and make a light pass from the inside of the edge toward the tip, following the bevel. Light means the weight of the tool, not your shoulder.
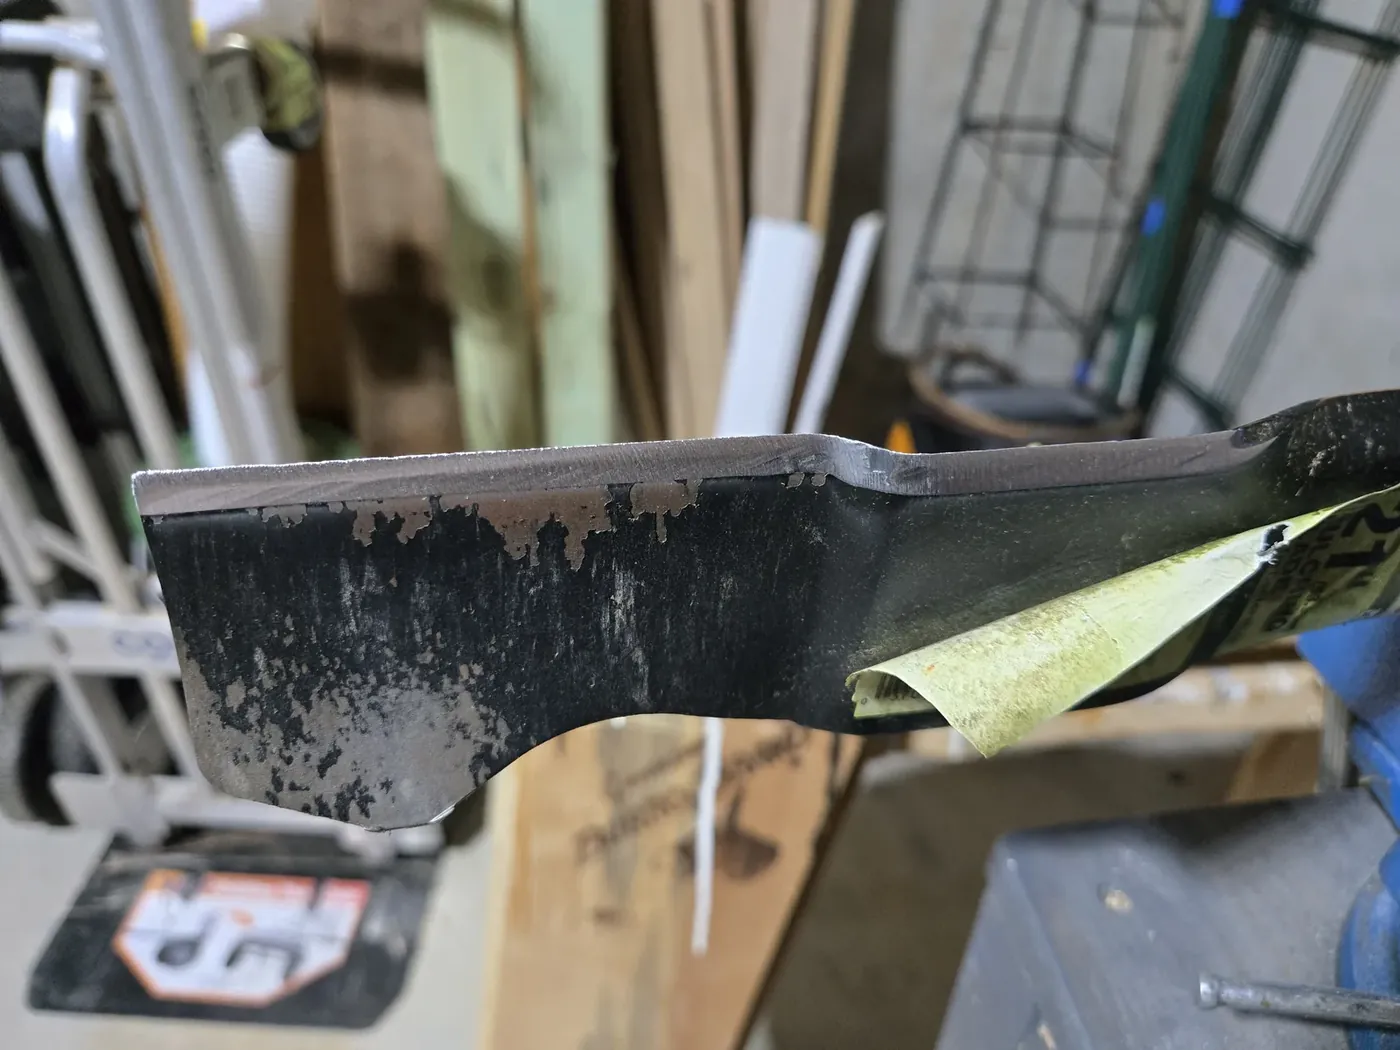
- Two or three passes, then stop and look. You’re looking for a clean, even, bright bevel from the inner end of the cutting edge to the tip, with the rounded-over edge gone.
- Keep the disc moving — never park it in one spot. If the steel starts to turn straw-colored or blue, you’ve overheated it and softened the edge. Dip the blade in the water bucket between sets of passes; this is the single biggest difference between an angle grinder and a hand file, and it’s why people ruin blades with grinders.
- Don’t chase a razor edge. Butter-knife sharp is the goal. A knife-thin edge chips on the first pebble.
- Don’t grind the flat bottom side. The bevel is on one side only. When you’re done, one light pass on the flat side (or a couple strokes with a file) knocks the burr off.
- Count your passes. You’re about to do the same number on the other end.
If the edge has real nicks, start with 40 grit to get below them, then switch to 60 to finish. Grind only as far back as the deepest nick — if that’s more than about 1/8 inch, go back and read the replace-list again.
Here’s what the edge should look like when you’re done — a clean, bright, even bevel:
Step 4: Flip It and Match the Other End
Loosen the vise, flip the blade end-for-end, clamp it with the other cutting edge up, and do exactly the same thing: same grit, same number of passes, same pressure. The point is not just to sharpen both ends — it’s to remove the same amount of steel from each end so the blade stays balanced.
Step 5: Balance It on a Nail
An unbalanced blade vibrates at 3,000 rpm, and that vibration chews up the engine’s crankshaft bearings, the deck, and your hands. This step is not optional — but the tool for it can be a nail.
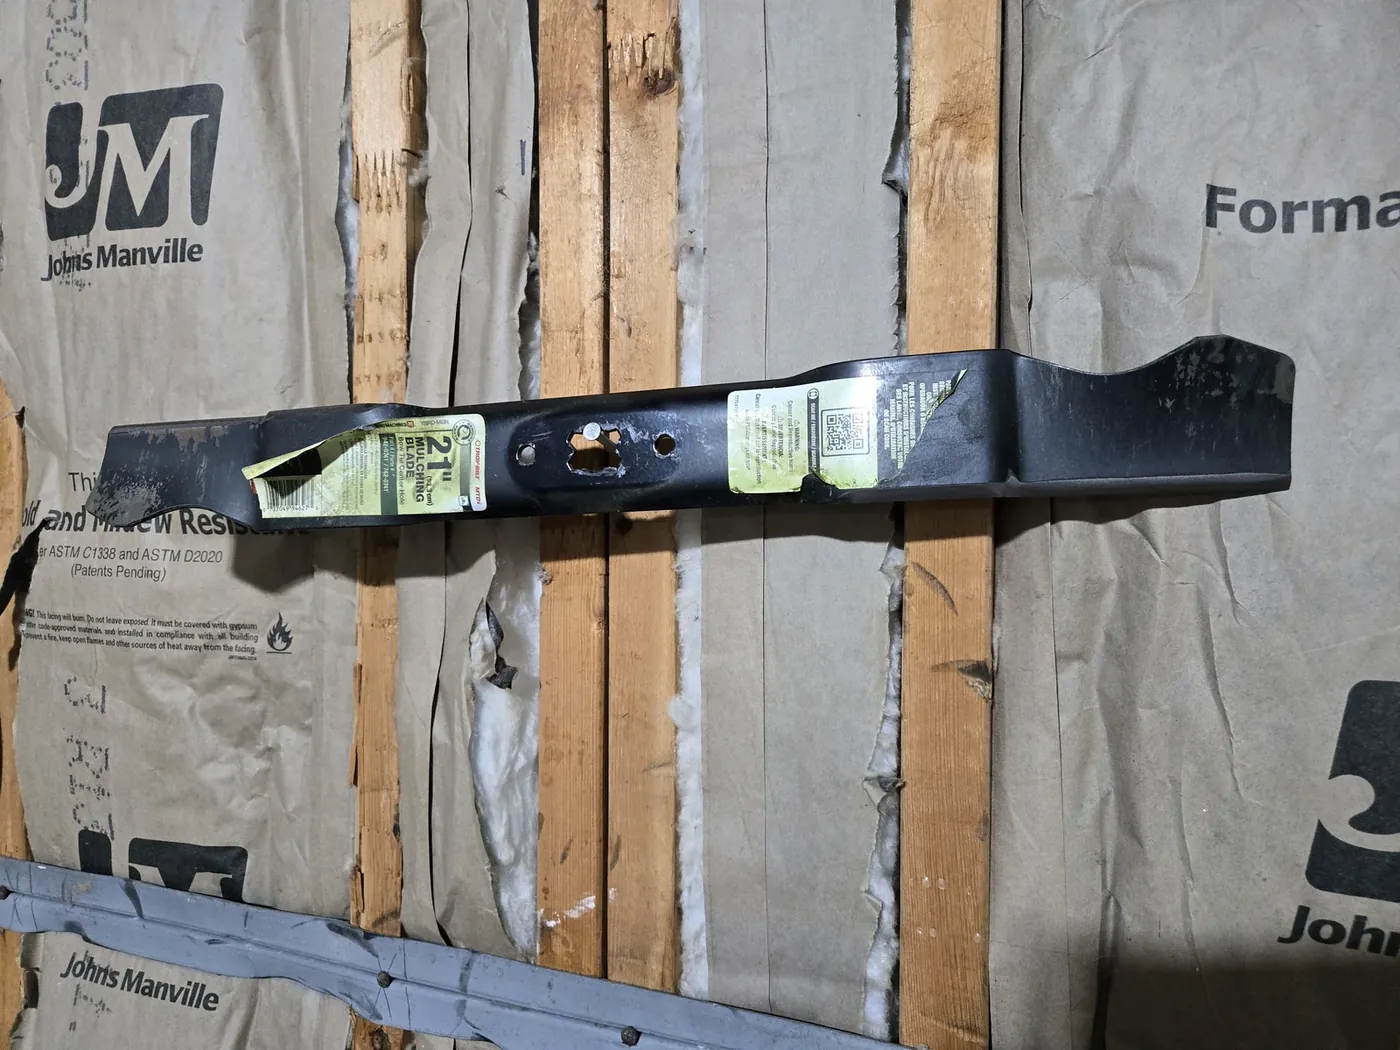
Drive a nail into a wall stud (or use one that’s already there) and hang the blade on it through the center hole, sitting level. If one end swings down, that end is heavy: take the blade back to the vise and make one or two more light passes on that end — on the bevel, or on the back non-cutting edge if the bevel already looks right — and hang it again. Repeat until it sits level or close to it. A cone-style blade balancer shows the same thing more precisely, but the nail has balanced every blade I’ve ever sharpened.
Step 6: Reinstall It
- Clean the spindle and the bolt threads.
- Put the blade back in the orientation from your photo — the cutting edges lead into the direction of rotation and the lift wings point up toward the deck. Most blades are stamped “BOTTOM” or “GRASS SIDE” on the side that faces the ground.
- Bow-tie retainer, bolt, hand-tight, then the 2x4 block back in and tighten it down with the ratchet. I go firm but not gorilla-tight — a solid pull on the ratchet handle, then stop. The failure modes are real in both directions: too loose and the blade can shift or come off, too tight and you can strip the crankshaft threads. If you’d rather have a number than a feel, your manual’s spec is typically 35–50 ft-lbs on a walk-behind and a torque wrench gets you there exactly.
- Pull the block, pull the sandwich bag out from under the gas cap, tip the mower back down, reconnect the spark plug wire.
- Start it on a flat spot and listen. A smooth idle means a balanced blade. Vibration means stop, pull the wire, and go back to step 5.
Angle Grinder vs. File vs. Bench Grinder vs. Drill Attachment
- Angle grinder + flap disc — fastest (a couple of minutes per end), leaves a clean edge, and removes steel fast enough that overheating and over-grinding are the risks. Best if you already own the grinder.
- 10-inch mill file — slow (10–15 minutes per end) but impossible to overheat and very easy to control. If you sharpen one blade a year and don’t own a grinder, this is fine.
- Bench grinder — excellent if you have one; same heat rules apply.
- Drill-mounted sharpening stones — cheap and quick, but they follow whatever angle you hold, which usually means a worse edge than you started with. Skip.
Whatever you use, the balance step is the same.
Mistakes I’ve Made (or Seen)
- Grinding too hard and too long. Blue steel is soft steel. Light passes, and dunk it.
- Uneven ends. Ten passes on one end and six on the other, then wondering why the mower shakes.
- Putting the blade on upside down. Take the photo.
- Skipping the spark plug wire. It takes five seconds. Every mechanic has a story about someone who didn’t.
- Skipping the gas-cap bag and tipping the mower anyway. Now the garage smells like a fuel spill and you’ve got gas on the deck you’re about to throw sparks near.
- Sharpening a bent blade. You can put a beautiful edge on a blade that will still vibrate and cut unevenly because it’s bowed. Inspect first.
- Leaving the shavings. Grinding throws steel filings all over the bench and floor; a magnetic sweeper picks them up in one pass instead of finding them in your tires.
Bottom Line
Pull the blade, clamp it, follow the factory bevel with a flap disc in light passes, keep it cool, do both ends the same, hang it on a nail to balance, and bolt it back on. Twice a season and your lawn will look like someone who knows what they’re doing mows it. The full spring routine — oil, filter, plug, blade — is in my lawn mower seasonal maintenance guide, and the fall shutdown that makes it start next April is in how to winterize a lawn mower. If you’re doing this in a garage that’s a disaster, the FastTrack wall storage system is how the grinder and the socket set stay off the floor.
Same idea, different tool: the chainsaw chain gets sharpened with a rotary sharpener on the same bench.
Frequently Asked Questions
How often should you sharpen a lawn mower blade?
Twice a season for a typical suburban lawn, or roughly every 20–25 hours of mowing. Sharpen sooner if the grass tips look torn and brown a day after mowing, if the mower bogs in normal grass, or if you've hit roots, rocks, or pine cones. Sandy soil dulls a blade fastest.
What angle do you sharpen a lawn mower blade at?
Match the factory bevel, which on most walk-behind mower blades is about 30 degrees (some are closer to 45). You are not choosing an angle — you're following the one that's already ground into the blade. Hold the flap disc flat against that existing bevel and it will take care of itself.
Can you sharpen a mower blade without removing it?
You can touch it up with a hand file while the mower is tipped, but don't put an angle grinder anywhere near a mounted blade — you can't control the angle, you can't balance the blade afterward, you're throwing sparks next to a gas tank, and the blade can turn the engine over. Pulling the blade takes five minutes and makes the whole job safer and better.
How sharp should a lawn mower blade be?
Butter-knife sharp, not razor sharp. A razor-thin edge chips on the first pebble and dulls faster. You want a clean, even bevel with the burr knocked off the flat side — sharp enough to slice a sheet of paper with some effort.
How many times can you sharpen a mower blade before replacing it?
Usually three or four sharpenings over a few seasons. Replace it when the cutting edge has nicks deeper than about 1/8 inch, when the blade is bent (sight down it or lay it on a flat surface), when the lift wing at the back is worn thin, or when sharpening has noticeably narrowed the blade.
What grit flap disc for sharpening mower blades?
A 60-grit zirconia flap disc is the all-rounder. Start with 40 grit if the edge has real nicks, then finish with 60 or 80 for a cleaner edge. Flap discs run cooler than a solid grinding wheel, which matters — overheating the steel ruins its temper.
Products Mentioned in This Article

DEWALT FLEXVOLT ADVANTAGE 20V MAX Angle Grinder (DCG416B)
20V MAX FLEXVOLT ADVANTAGE brushless 4-1/2 to 5 inch angle grinder with paddle switch and kickback brake. The grinder I sharpen my mower blade with.
- Brushless motor and kickback brake — disc stops fast when you let go of the paddle
- Runs on the same 20V batteries as the rest of a DeWalt kit (more power on FlexVolt packs)
- Paddle switch is a real safety feature for a tool that throws sparks
- Tool-only — you need a 20V battery and charger
- Overkill if you'll only ever sharpen one blade a season; a corded grinder is cheaper
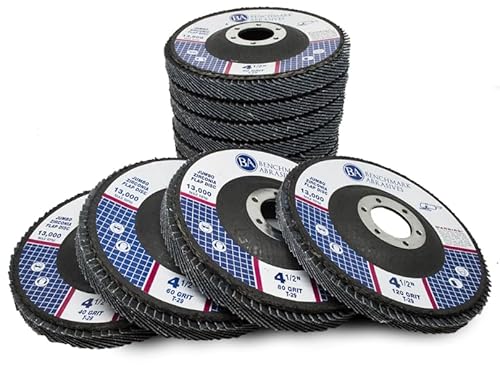
Benchmark Abrasives 4.5" Jumbo Zirconia Flap Discs (Mixed Grit)
Jumbo zirconia Type 29 flap discs, 7/8 inch arbor — the exact discs in my grinder drawer. Flap discs grind cooler and leave a smoother edge than a grinding wheel, which is the right behavior for a mower blade.
- 40 grit for chewing past nicks, 60 for the normal touch-up
- Zirconia holds up far longer than aluminum-oxide discs
- Fits any standard 4-1/2 inch grinder
- 10 discs is years of mower blades — but they're useful for rust and paint too

DEWALT Mechanics Tool Set, 108-Piece (DWMT73801)
108-piece 1/4" and 3/8" drive mechanics set, SAE and metric. Mine is the Husky equivalent from Home Depot and it's handled every blade bolt and spark plug on this site — this DeWalt set is the same idea if you're buying on Amazon.
- Covers the 9/16", 5/8", and 3/4" sizes mower blade bolts actually come in
- 72-tooth ratchet has enough leverage for a seasons-old blade bolt
- SAE + metric means it also covers the bikes, the truck, and the FastTrack lags
- The case is bulky; if you already own a socket set in the right sizes, you don't need another

Yost LV-4 Homeowner's Vise (4-1/2 inch jaw)
Bench vise with swivel base. You cannot safely grind a blade you're holding in your hand — it has to be clamped, and this is the vise that doesn't cost a fortune.
- Swivel base lets you angle the blade toward you
- Cast iron, wide enough jaws for a mower blade
- Needs a solid bench to bolt to — it's useless clamped to a wobbly table
Prices shown were retrieved from Amazon on Oct 8, 2026, 2:37 PM UTC. Product prices and availability are accurate as of the date/time indicated and are subject to change. Any price and availability information displayed on Amazon at the time of purchase will apply to the purchase of this product.