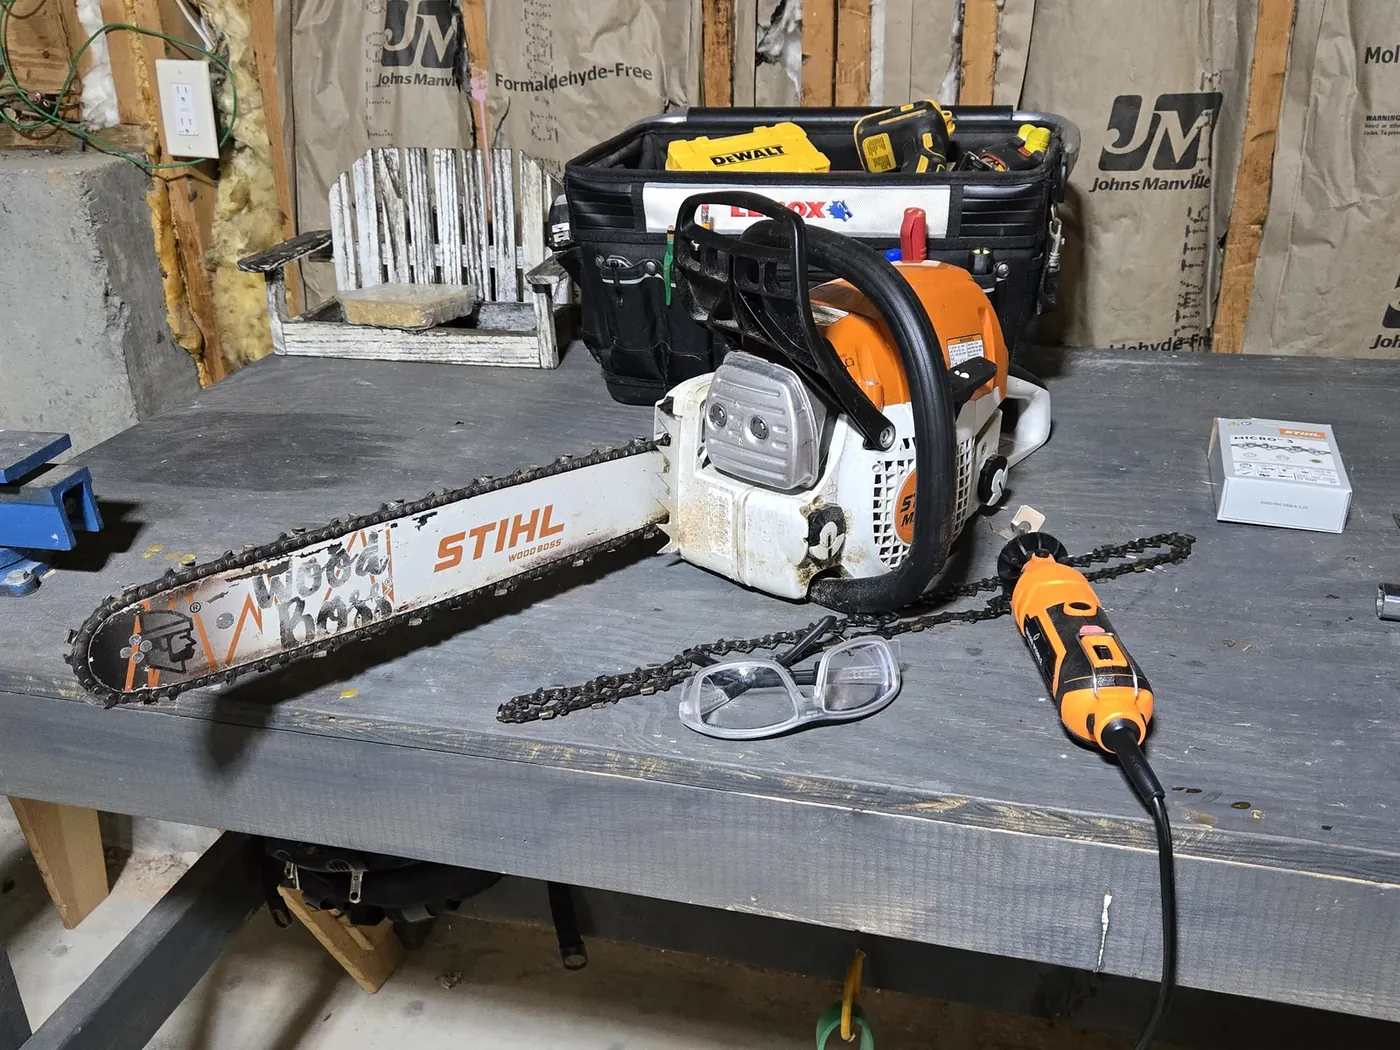
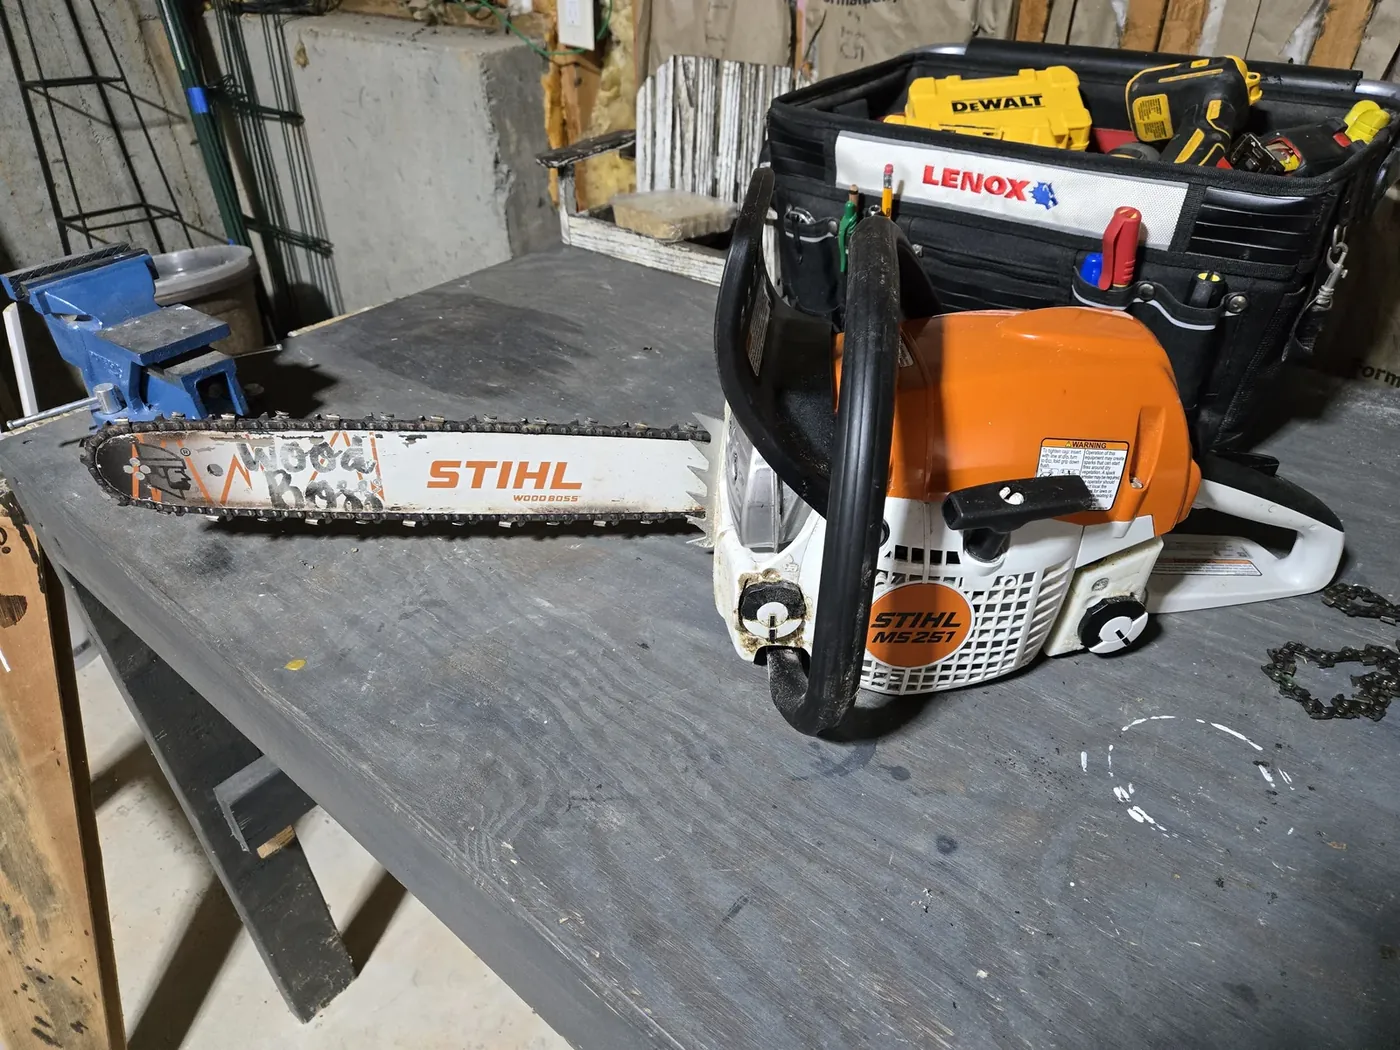
We had some oaks and pines too close to the house that had to come down. I paid a crew to drop them and did the bucking myself, which is how I ended up with a Stihl MS 251 Wood Boss with a 16-inch bar and a firewood pile. A few hours in, the chain hit something metal buried in one of the trunks, and the saw went from throwing chips to throwing dust and smoke, with me leaning on it to get through anything. That’s a dull chain, not a tired saw. Here’s how I sharpen it now, with a rotary sharpener instead of a hand file, and how I know when the chain is done.
Gear Up First
A chain being sharpened can’t hurt you, but a chain being used can, and a sharp one bites faster. This is what I wear every time the saw runs:
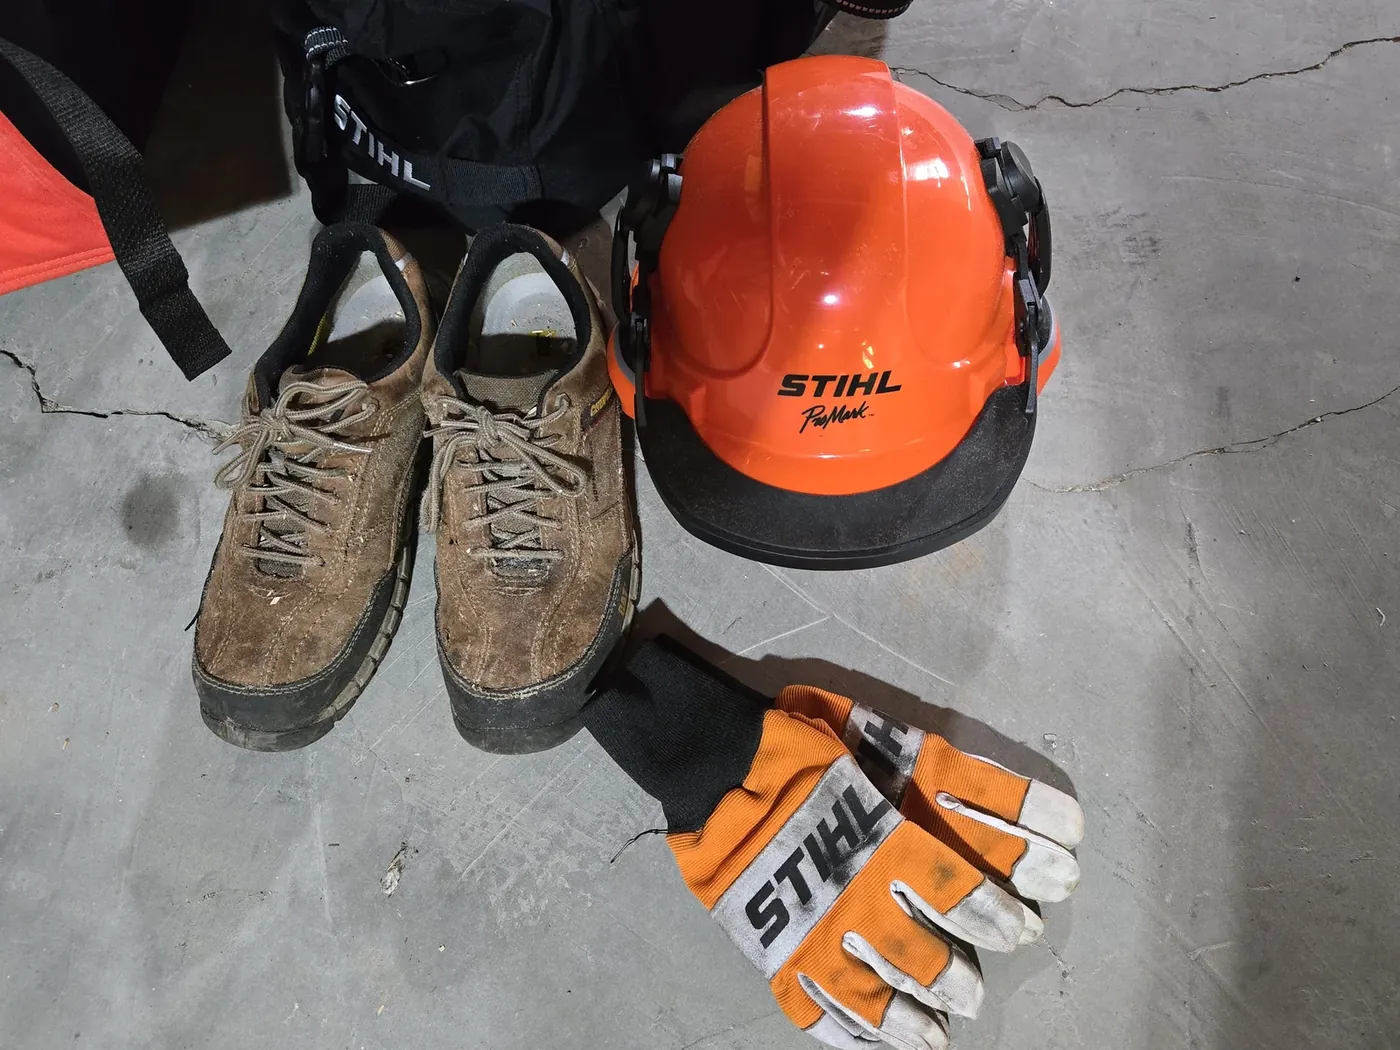
- Chaps. Cut-retardant chaps are the single piece of gear that turns a slip into a ruined pair of pants instead of a trip to the ER. Mine are the Stihl ones.
- Helmet with face screen and ear muffs. The mesh screen stops chips, the muffs matter because a chainsaw at your ear is well over the level that causes permanent hearing loss.
- Gloves. Grip and vibration, plus they keep your knuckles off the chain when you’re handling it at the bench.
- Steel-toe boots. Mine are from Academy. Dropping a round on a sneaker is a broken toe.
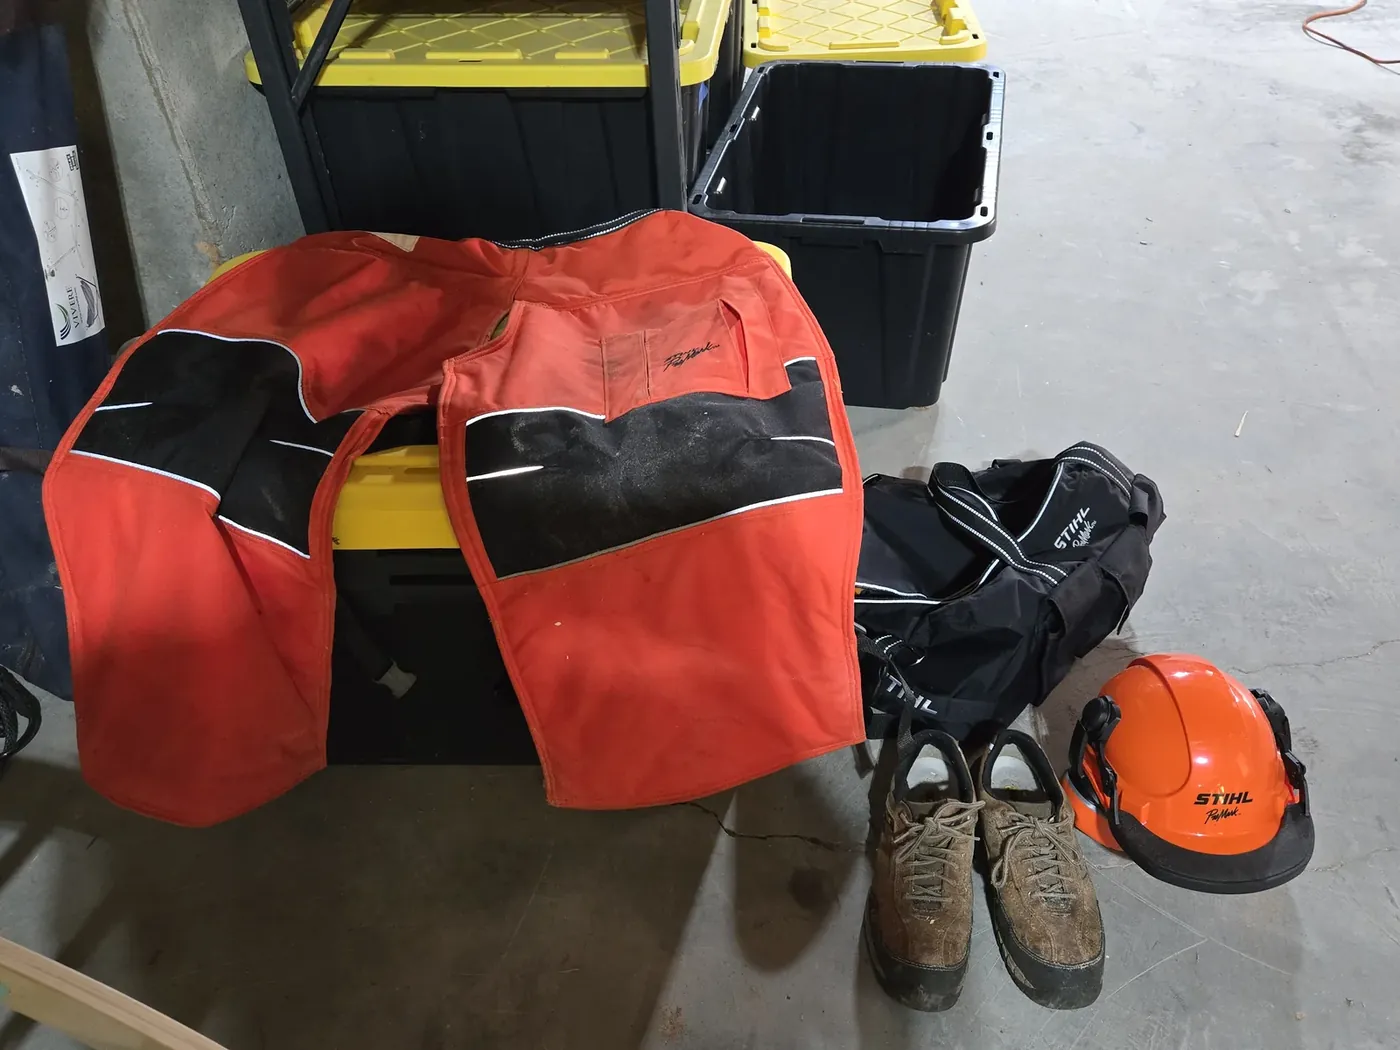
I bought the chaps, helmet, and gloves as a Stihl kit at the local Ace. The Husqvarna chaps and helmet linked above are the Amazon equivalents.
Read the Chain Box Before You Buy Anything
Every question people ask about sharpening — what size file, what angle, how deep to set the rakers — is printed on the chain’s packaging. Keep the box.
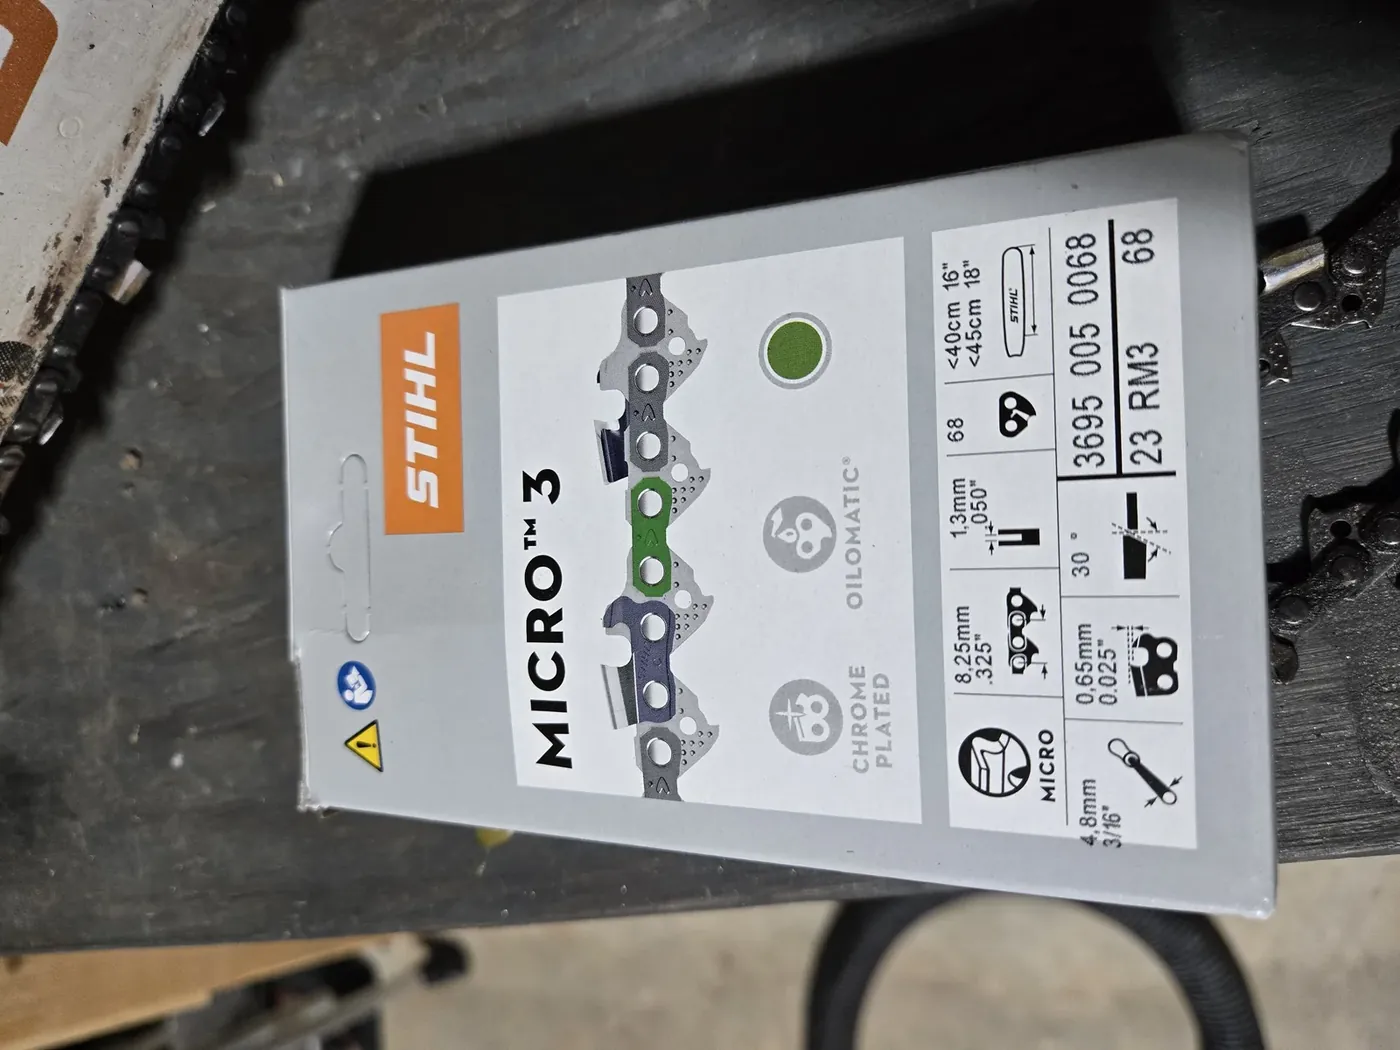
Mine is a Stihl 23 RM3 68 (Rapid Micro 3), and the box says:
| Spec | My chain | What it decides |
|---|---|---|
| Pitch | .325 in (8.25 mm) | File / stone size |
| Gauge | .050 in (1.3 mm) | Which bar it fits |
| Drive links | 68 | Which bar length it fits |
| File / stone | 3/16 in (4.8 mm) | The bit you buy |
| Top plate angle | 30° | The line you use on the angle guide |
| Depth gauge | .025 in (0.65 mm) | How far the rakers sit below the cutters |
If you’ve lost the box, the pitch and gauge are usually stamped on the bar near the tail, and the drive link count you can just count. Then use this:
| Chain pitch | Round file / stone |
|---|---|
| 1/4 in | 5/32 in (4.0 mm) |
| 3/8 in low-profile (most small homeowner saws) | 5/32 in (4.0 mm) |
| .325 in (MS 251 and most 40–50 cc saws) | 3/16 in (4.8 mm) |
| 3/8 in full | 7/32 in (5.5 mm) |
| .404 in | 7/32 in (5.5 mm) |
Using the wrong size is the most common sharpening mistake. Too small a stone digs a hook into the cutter that grabs and stalls; too big rounds the edge off so it never really gets sharp.
Set Up the Saw
- Engine off, chain brake on, saw cool. I do this on the bench, not on the tailgate.
- Steady the saw. I don’t clamp the bar; I lay the saw flat on the bench and hold the bar down with my off hand while the other runs the sharpener. If you have a vise, clamping the bar frees up both hands, but it isn’t required. What matters is that the bar can’t move while the angle guide is on the cutter.
- Tension the chain a little tighter than running tension so the cutters don’t rock while you’re grinding. You’ll back it off at the end.
- Mark the first cutter with a Sharpie so you know when you’ve gone all the way around.
- Safety glasses. A rotary tool at 30,000 rpm throws grit and the occasional stone fragment.
Sharpen Each Cutter
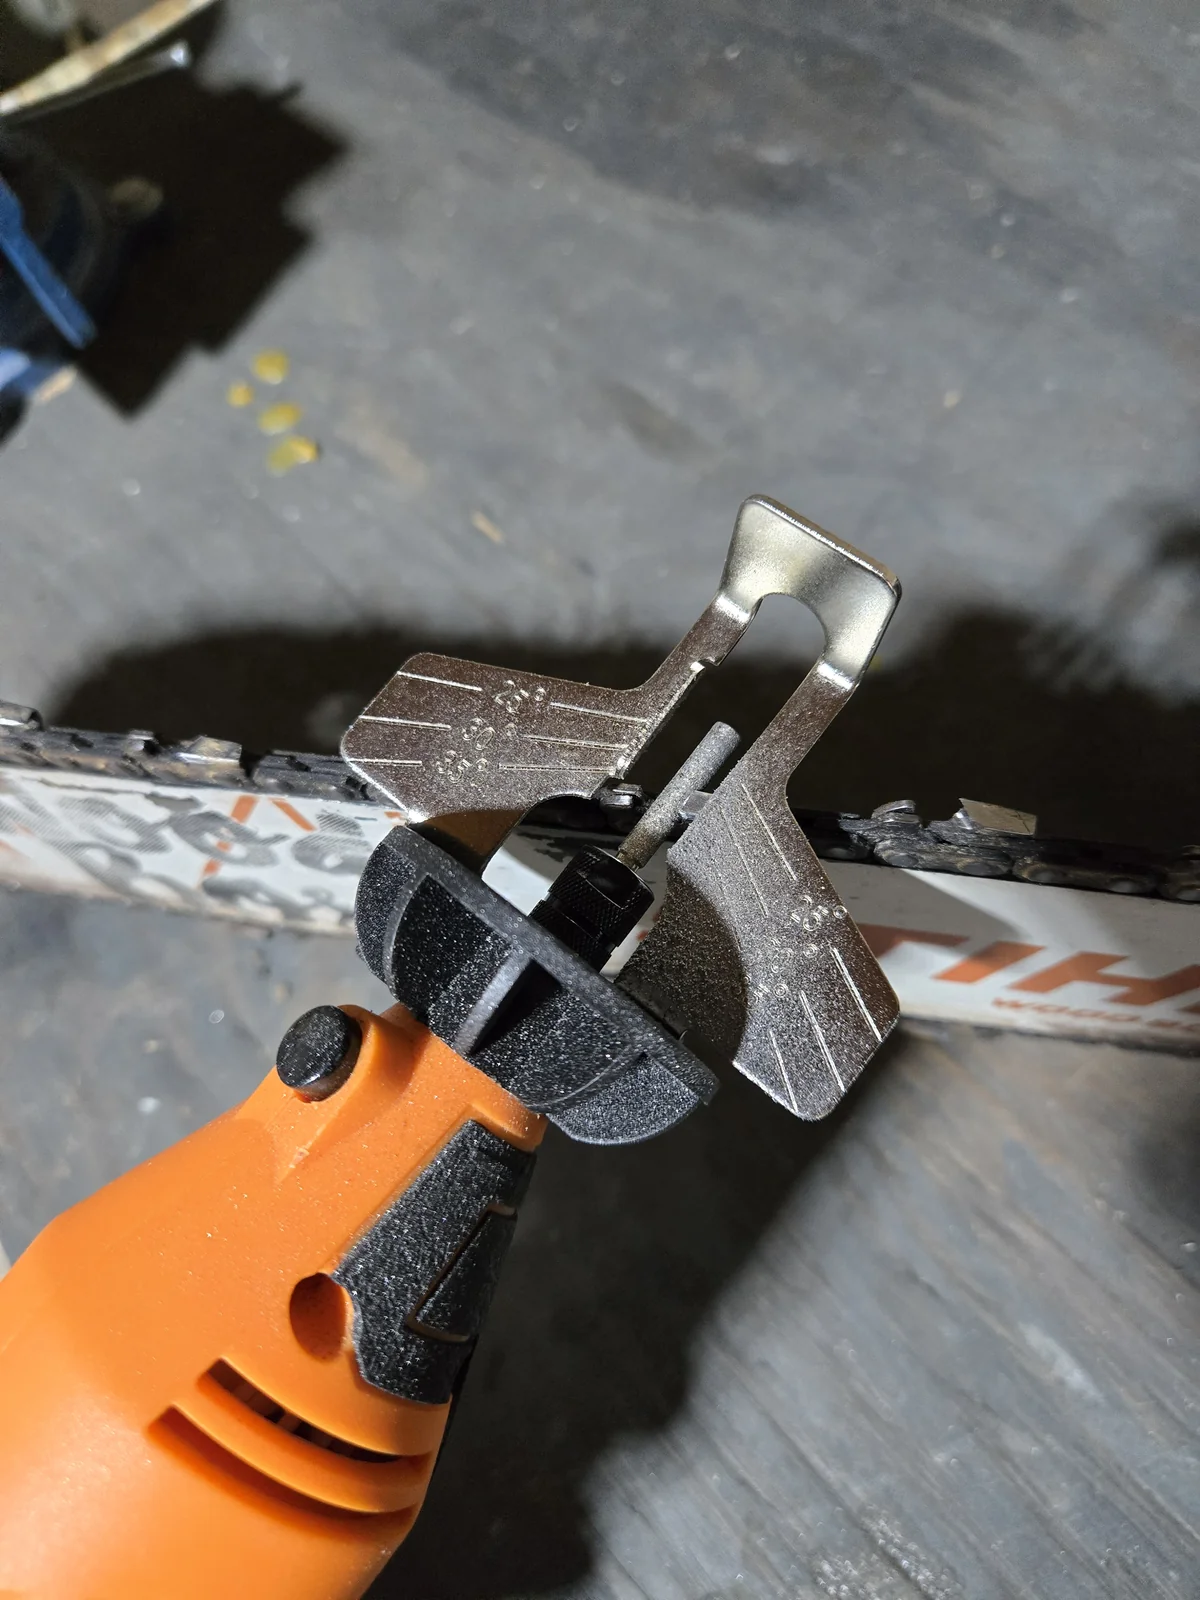
The sharpener is a small corded rotary tool with a metal guide that clamps over the stone. The guide has angle lines on it; you set the stone in the cutter’s curved face and turn the tool until the 30-degree line runs parallel to the bar. That’s the whole trick — the guide holds the angle, you just keep it flat.
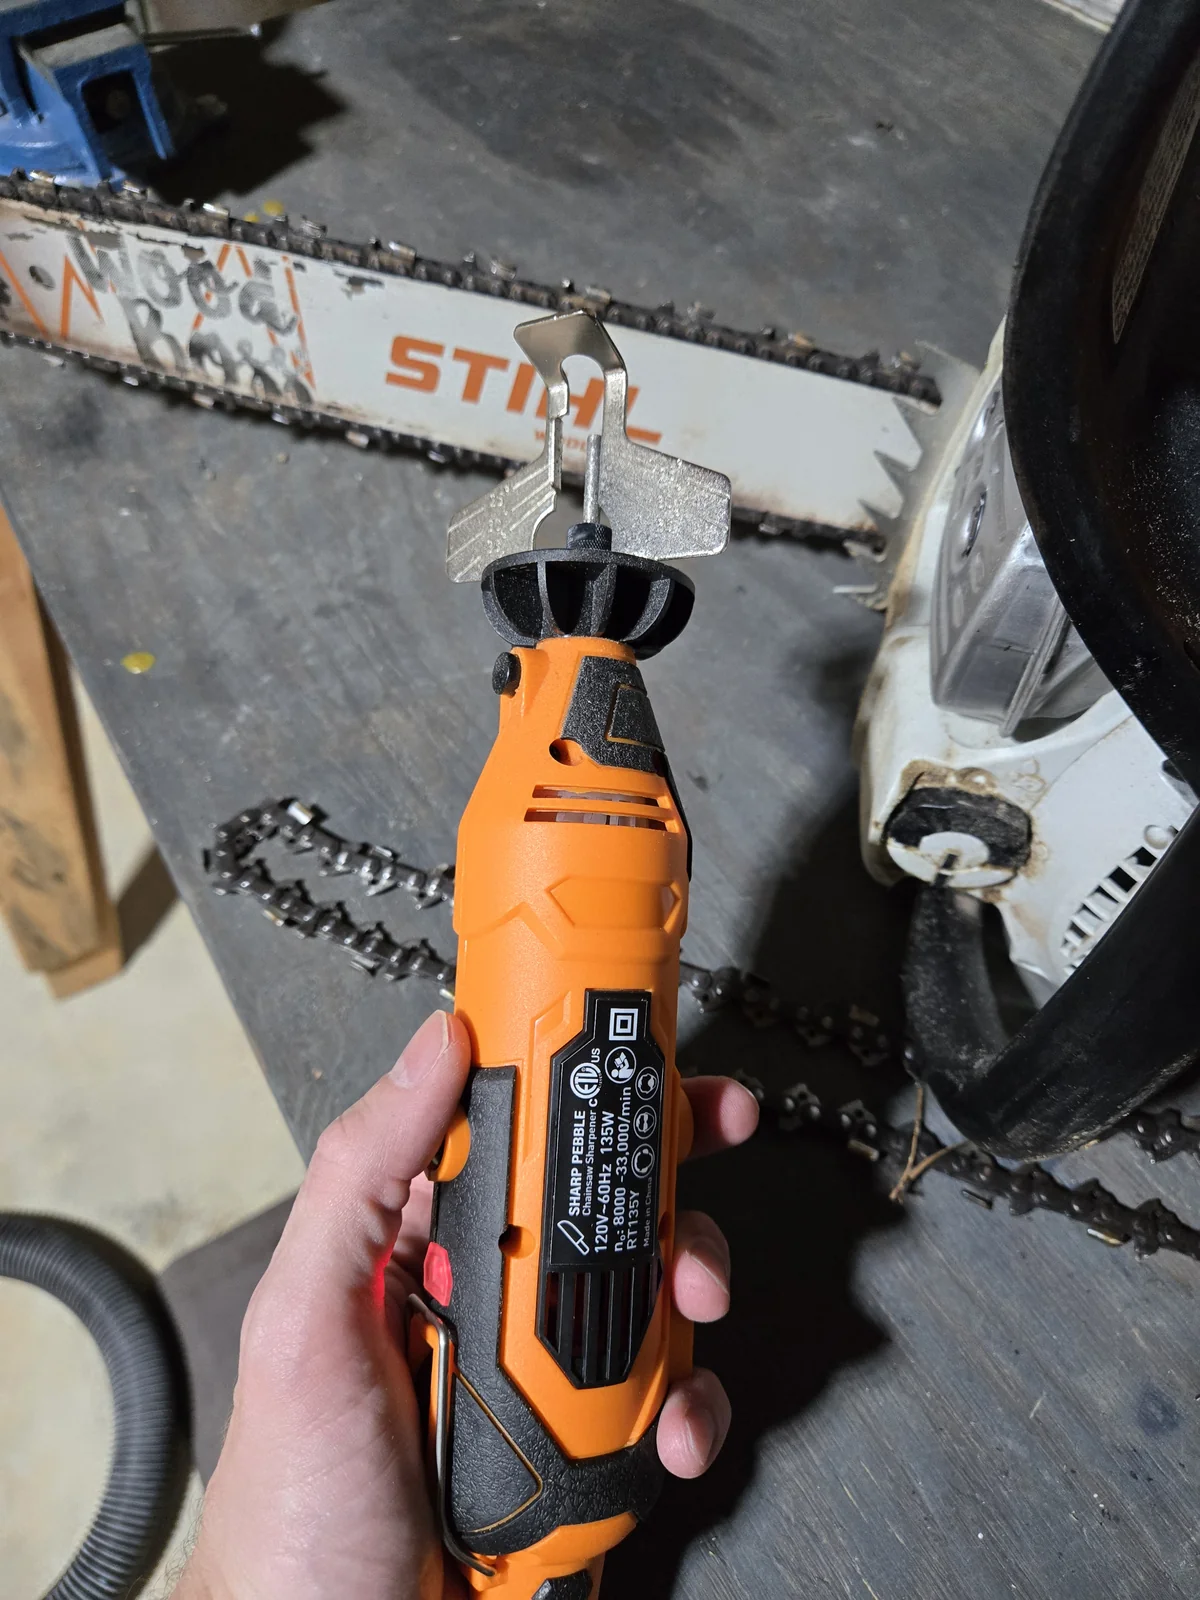
How I do a chain:
- Fit the 3/16 inch bit. The kit comes with stones in the common sizes; I swapped to the Byane diamond bits in 3/16 because they last far longer. A stone wears smaller with every chain, and a smaller stone changes the cutter’s profile. The diamond bit stays the same size.
- Start on the marked cutter. Rest the stone in the gullet — the curved part under the top plate — with the guide flat on the chain and the 30-degree line parallel to the bar.
- Grind from the inside of the cutter toward the outside, light pressure, two or three seconds. Let the stone cut; pushing hard heats the cutter and takes the temper out of the edge (you’ll see it turn blue — that tooth is now soft).
- Same number of passes on every cutter. Count. Uneven cutters are why a saw cuts in a curve.
- Do every cutter facing one direction, then flip the saw around (or walk to the other side) and do the ones facing the other way.
- Check your work. A sharpened cutter has a bright, clean edge along the top plate and side plate, with no shiny flat spot at the very tip.
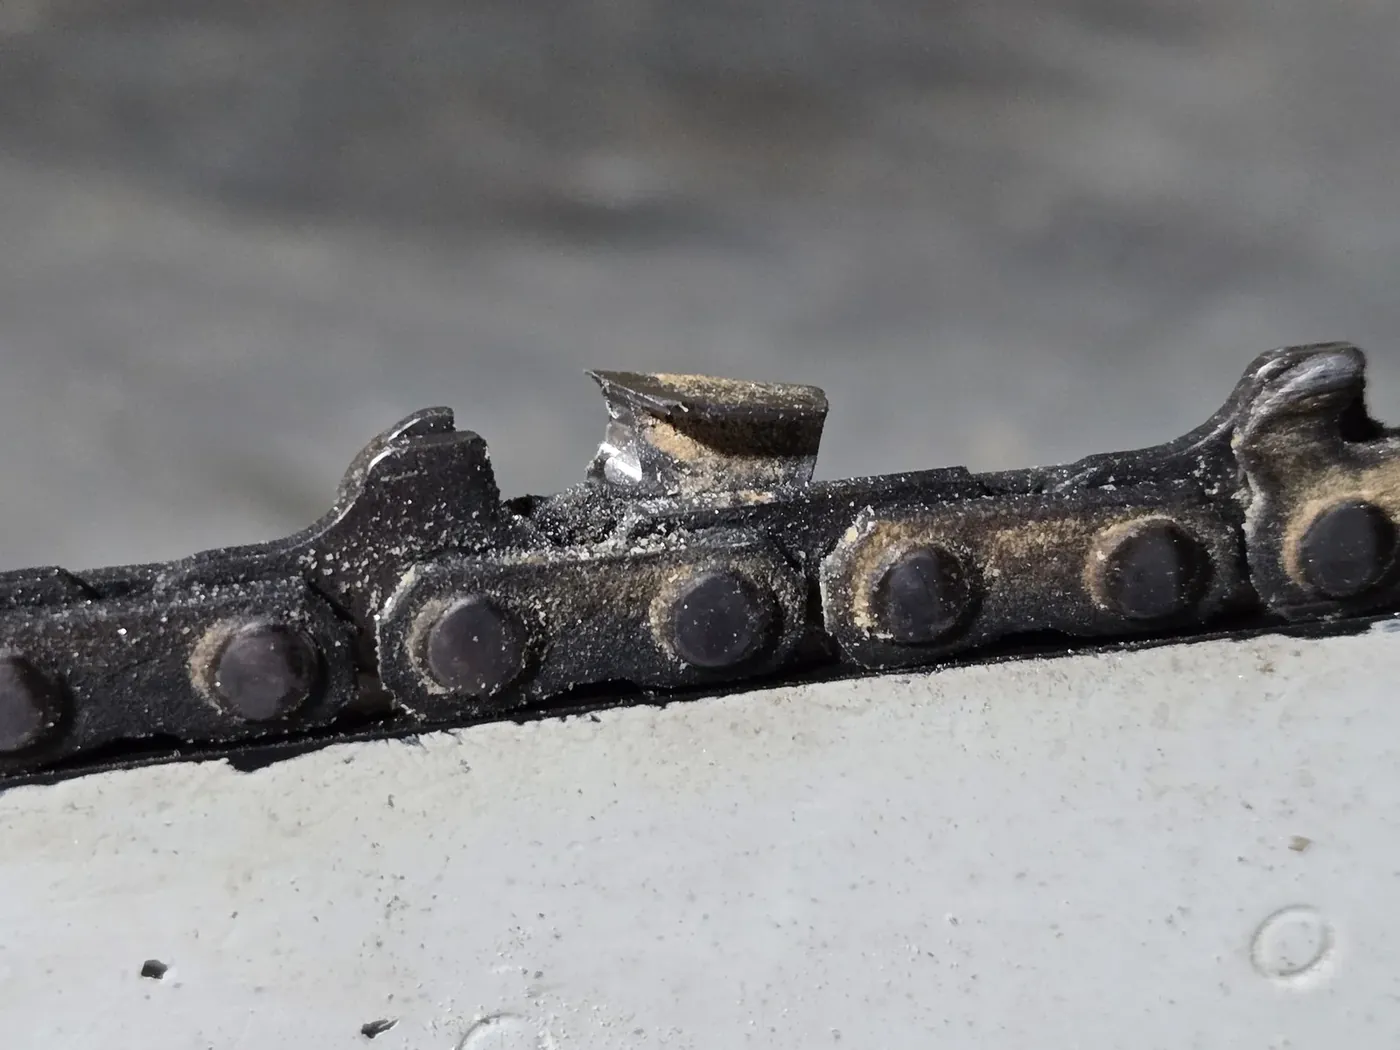
That close-up is honest, not pretty: the stone wandered a hair on that tooth and the bevel isn’t textbook. It still cuts fine. The test that matters is the next cut — a sharp chain pulls itself into the wood and throws real chips instead of dust — not whether every cutter photographs like the one on the box.
Once you’ve done it a couple of times, a full chain is about ten minutes.
Depth gauges (rakers)
The little bumps in front of each cutter set how big a bite the cutter takes. Every time you sharpen, the cutter gets shorter and lower, and eventually the raker sits too high and the chain won’t cut no matter how sharp it is. The box says .025 inch below the cutter. Every three to five sharpenings, set a depth gauge tool over the chain and take down any raker that sticks up above it with a flat file, then round its leading corner off. My chain is new enough that I haven’t needed to touch the rakers yet; that’s the next job on it.
Re-Tension the Chain
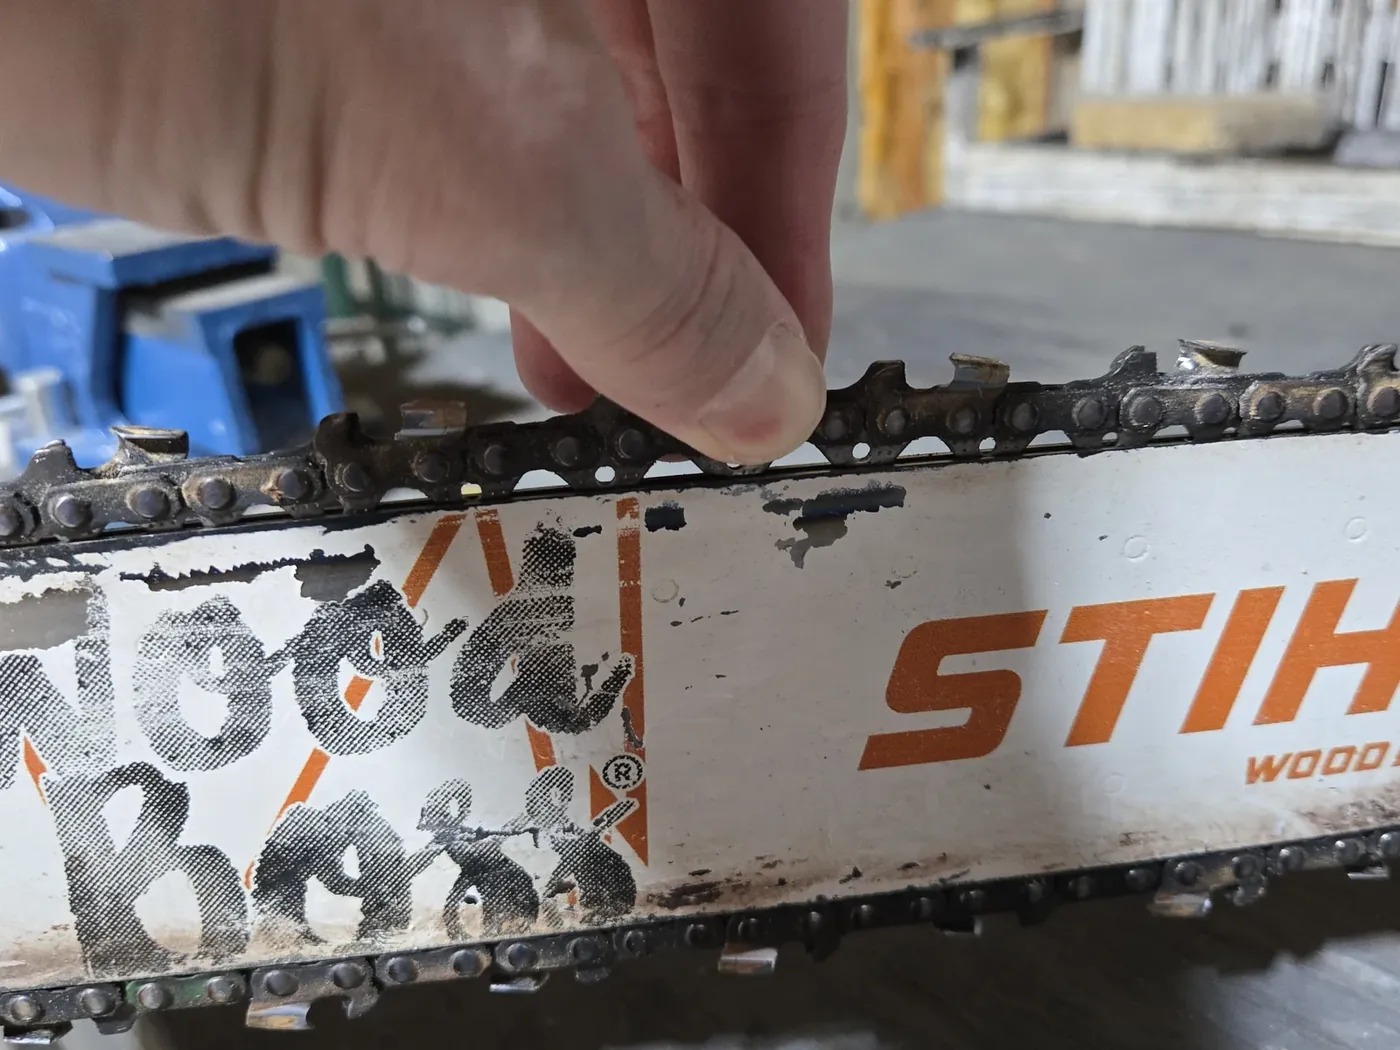
Sharpening is also the moment to fix tension, and the MS 251 makes it easy: loosen the single bar nut with the scrench (the combination wrench that comes with the saw), turn the tensioning screw on the side of the clutch cover, then snug the nut back down while holding the bar tip up. One nut, not two — the MS 251 uses a single nut on the sprocket cover, which is one less thing to drop in the sawdust.
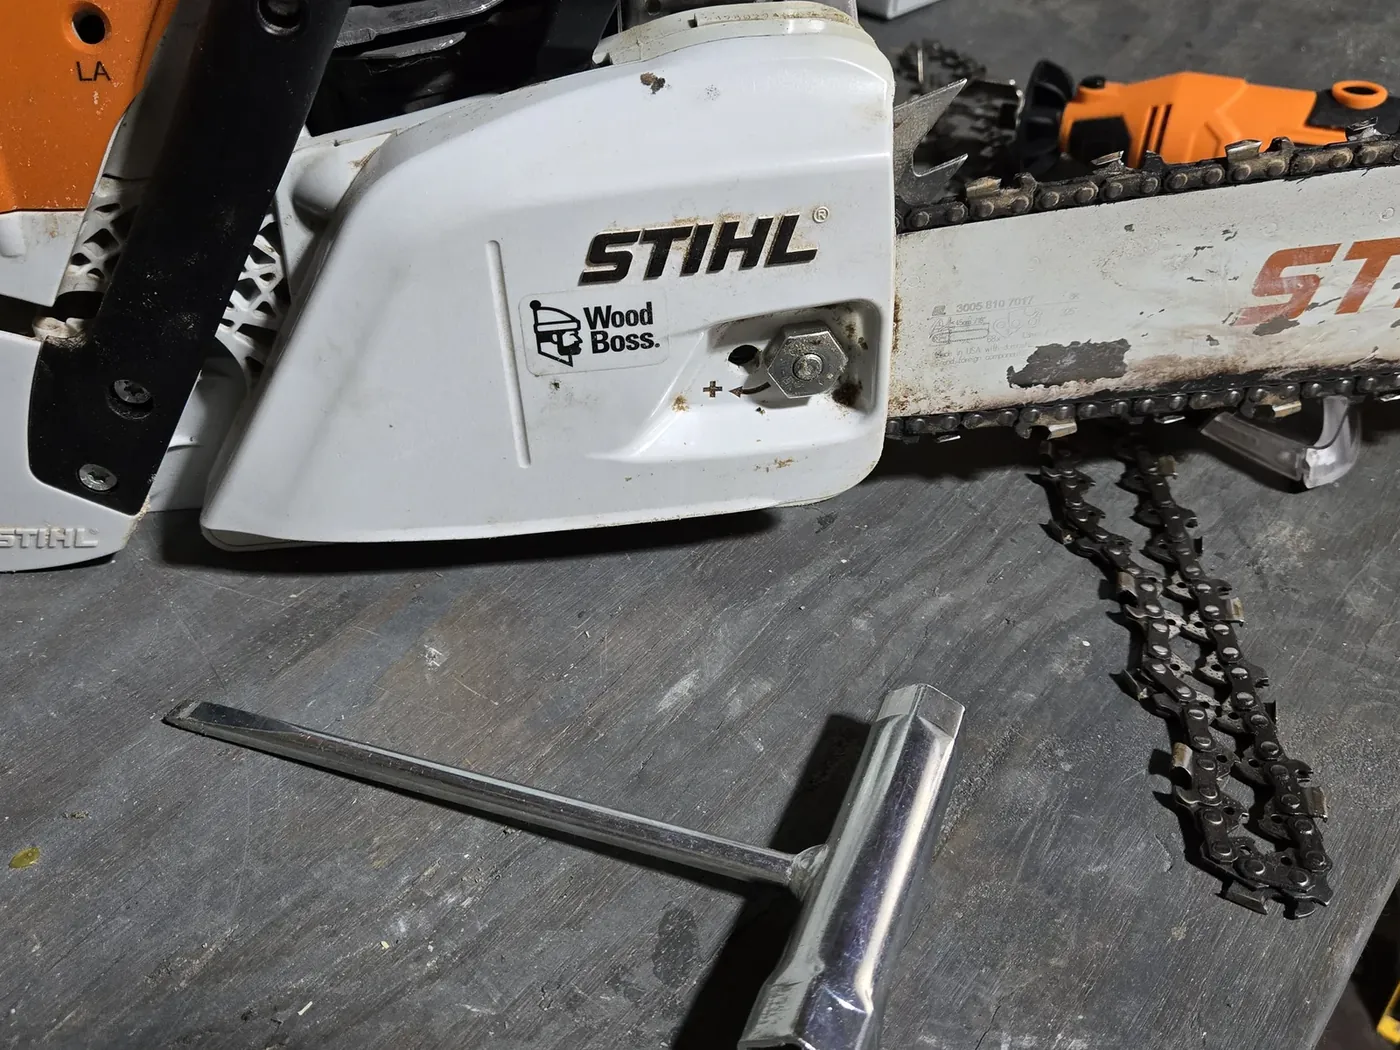
The test is the one in the photo: lift the chain at the middle of the bar. The drive links should stay in the groove, but the chain should come up a bit and snap back. Too loose and the drive links pull clear of the bar — that’s a chain that can throw. Too tight and you can’t pull it around the bar by hand with a glove on — that burns the bar and the sprocket. Chains stretch when they get hot, so check it again after the first few cuts, and let a hot saw cool before you retighten it or it’ll be too tight once it shrinks back.
When to Sharpen, and When to Stop Sharpening
Sharpen when:
- The saw makes fine dust instead of proper chips.
- You have to push the bar into the wood instead of letting the weight of the saw do it.
- It pulls to one side (one side’s cutters are duller — count your passes next time).
- You touched dirt, a rock, or a nail. Even one hit takes the edge off.
For me that’s about every four hours of cutting on clean wood, and immediately if I hit anything metal. The first time I sharpened was because of a nail or fence staple buried in a trunk, a few hours into the job. A few seconds per cutter at the bench beats fighting a dull saw for an hour.
Replace when:
- The cutters are filed back close to the wear mark stamped on the cutter (you’ll have sharpened a chain many times before this).
- The tensioner is maxed out and the chain is still loose — it’s stretched.
- Any cutter, tie strap, or drive link is cracked, bent, or missing.
A new 68-link loop is cheap next to a bar or a sprocket, and the part number is on the box, so reordering the exact chain is a two-minute job. I keep a spare loop on the bench so a rocked chain doesn’t end the day.
What It Cut
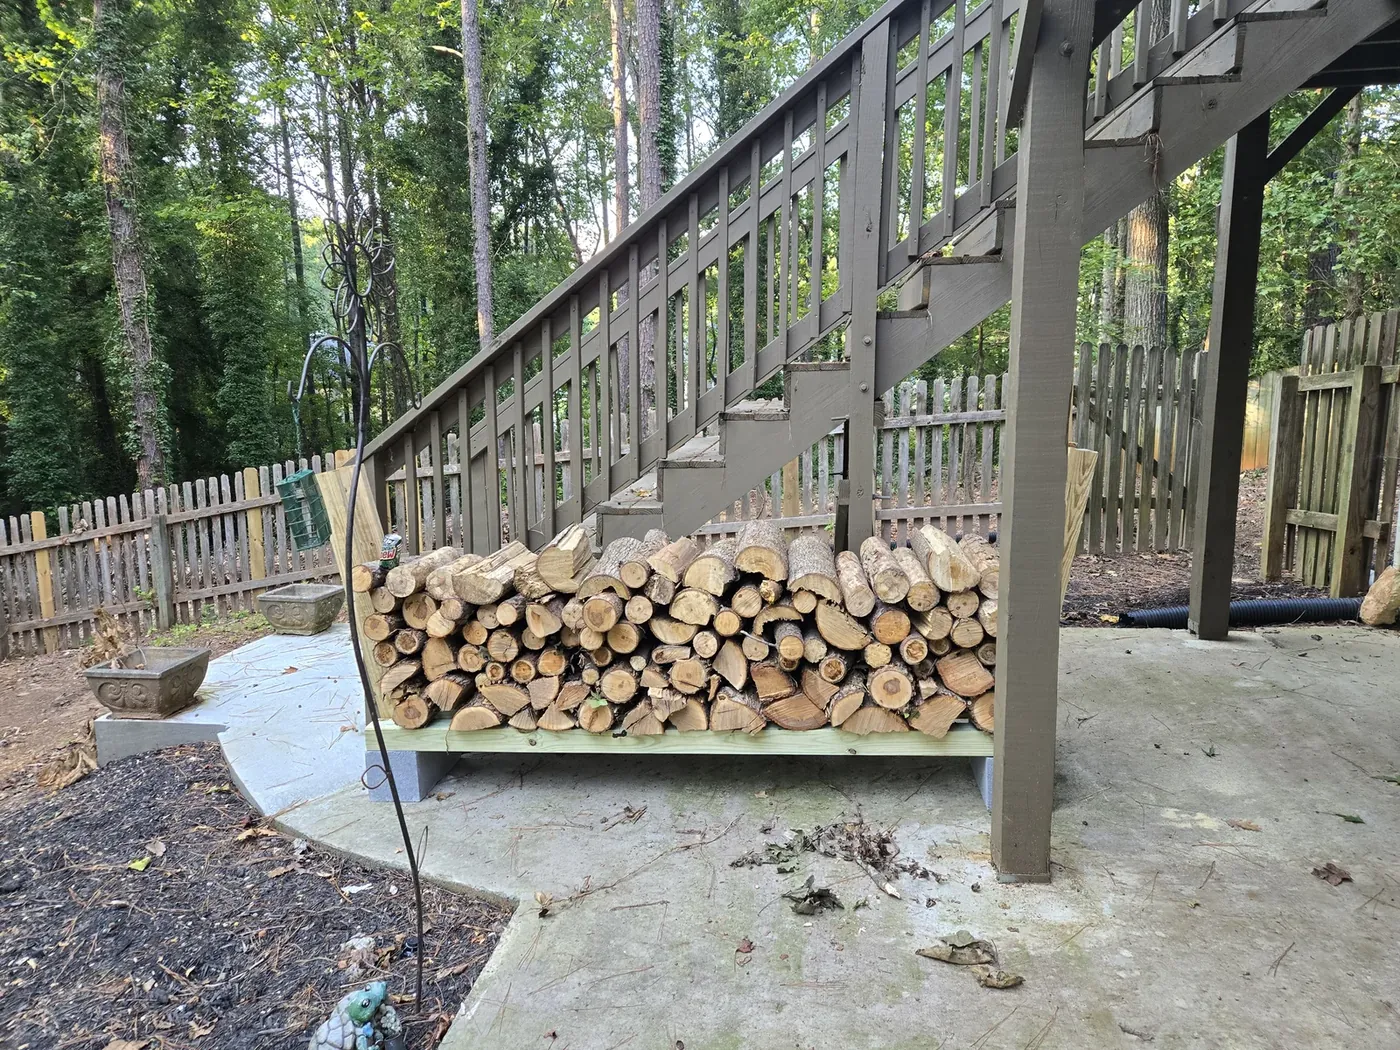
That’s the result: the oak and pine that were too close to the house, bucked into rounds and stacked under the deck stairs to season. The difference after sharpening was massive. A sharp chain melts through a round under the saw’s own weight; the dull one had me forcing it while the bar smoked and the saw overheated.
If you’re setting up the rest of the garage for outdoor gear, the saw lives on the same Rubbermaid FastTrack wall as the trimmer and blower, and it gets the same end-of-season shutdown as the other gas tools.
Frequently Asked Questions
What size file or stone do I need for my chainsaw chain?
Look at the chain box or the bar. The chain pitch sets the file or stone size — 1/4 inch and 3/8 inch low-profile chains take a 5/32 inch (4.0 mm) file, .325 inch chain takes 3/16 inch (4.8 mm), and full 3/8 inch and .404 inch chains take 7/32 inch (5.5 mm). Stihl prints the size right on the box next to the angle; my Micro 3 chain calls for 4.8 mm / 3/16 inch and 30 degrees.
What angle do you sharpen a chainsaw chain at?
Almost every homeowner chain is 30 degrees on the top plate, and the box says so. Hold the angle guide's 30-degree line parallel to the bar and keep the stone level. Some chisel and ripping chains use 25 or 10 degrees, so check the packaging rather than assuming.
Can you sharpen a chainsaw with a Dremel or rotary tool?
Yes. A rotary tool with a chainsaw stone and an angle guide is the fastest way for a homeowner to do it — a few seconds per cutter, same number of passes on every tooth. The two things that matter are the stone diameter matching the chain pitch and keeping the angle guide flat on the chain so you do not round the cutter off.
How often should you sharpen a chainsaw chain?
Sharpen when the saw starts making fine dust instead of chips, when you have to push it into the cut, or when it pulls to one side. For most homeowners that is every tank or two of fuel, and immediately after touching dirt or a nail. A dull chain is the number one reason a good saw seems underpowered.
How tight should a chainsaw chain be?
With the chain brake off and the saw cold, lift the chain at the middle of the bar. Properly tensioned, the drive links stay in the bar groove but you can pull it up a little — the "snap test." If the drive links pull out of the groove, tighten. If you cannot pull the chain around the bar by hand (glove on), it is too tight.
When should you replace a chainsaw chain instead of sharpening it?
When the cutters have been filed back near the wear mark stamped on the cutter, when the chain has stretched past what the tensioner can take up, or when a cutter or drive link is cracked or missing. A chain is cheap next to a bar, a sprocket, or a kickback injury, so replace it when it is done rather than nursing it.
Products Mentioned in This Article

Sharp Pebble Electric Chainsaw Sharpener Kit
The rotary sharpener I use. It is a small corded rotary tool with a chainsaw angle guide that clamps over the stone, plus stones in the common sizes. Match the stone to your chain pitch (3/16 inch for my .325 chain) and line the guide up at 30 degrees.
- Angle guide takes the guesswork out of holding 30 degrees
- Seconds per cutter instead of minutes with a hand file
- Comes with the four common stone sizes
- Corded, so you sharpen at the bench rather than at the woodpile
- The included stones wear quickly if you lean on them

Byane Diamond Chainsaw Sharpening Bits, 3/16 inch (4.8 mm)
The 3/16 inch (4.8 mm) diamond bits I run in the sharpener. They fit the same rotary tool and hold their shape far longer than the stones the kit ships with.
- Keep their diameter instead of shrinking as they wear
- Same 1/8 inch shank as the kit's stones
- Sized for one pitch — buy the 3/16 inch set only if your chain calls for it
- Diamond bits cut fast, so keep the passes light

Husqvarna Technical Apron Wrap Chainsaw Chaps
Cut-retardant chaps are the one piece of chainsaw gear that turns a slip into a ruined pair of pants instead of an ER visit. Mine are the Stihl ones from the local Ace; this is the Husqvarna equivalent, the best-reviewed pair on Amazon.
- Multi-layer cut-retardant fill that stops a chain
- Adjustable waist and leg straps go over work pants
- Apron style leaves the back of the leg uncovered — fine for bucking, not for climbing

Husqvarna Chainsaw Helmet with Mesh Face Shield and Ear Muffs
Helmet, mesh face screen, and ear muffs in one unit, so the muffs and screen are always on your head when the saw is. Same setup as my Stihl helmet in the photos.
- Screen and muffs flip up and stay attached
- Ratchet adjustment fits over a hat
- Mesh screen alone is not eye protection — wear glasses under it when grinding
Prices shown were retrieved from Amazon on Oct 8, 2026, 2:37 PM UTC. Product prices and availability are accurate as of the date/time indicated and are subject to change. Any price and availability information displayed on Amazon at the time of purchase will apply to the purchase of this product.