The longer you train jiu jitsu, the more you realize that staying on the mat is the goal — not just getting better while you’re on it. I’ve been grappling as an older practitioner for long enough to know that bjj injury prevention isn’t something you think about after you get hurt. It’s the work you do before that keeps you training consistently for years instead of cycling through injuries and layoffs.
This guide covers exactly what I do — the specific equipment I use, how I structure my prehab sessions, and why each piece of gear targets the areas most likely to get beat up in jiu jitsu. No filler, no generic “stretch more” advice. Just what’s actually in my garage and why.
Quick answer: The Iron Neck Alpha Harness ($55) is the single highest-impact piece of prehab equipment for BJJ. Pair it with resistance bands and dead hangs for shoulder health, and reverse sled pulls for knees. My full prehab setup costs under $200 and takes 15 minutes, 3-4 times per week.
What You Need to Know About Staying Healthy in BJJ
The Injury Reality for Older Grapplers
If you’ve trained for any length of time, you already know the usual suspects. Studies on BJJ injury rates consistently point to the same areas: shoulders, knees, neck, and low back. For older grapplers — I’m talking the over-40 crowd — these aren’t just inconveniences. A shoulder injury can sideline you for three to six months. A neck issue can be worse.
The problem is that most people treat these areas reactively. They get hurt, they rehab, they come back. I’ve been on that cycle, and it’s not fun. The shift that made a real difference for me was treating prehab like training — scheduled, consistent, and specific to what jiu jitsu actually demands of your body.
Why BJJ Is Hard on the Body (Especially Over 40)
Jiu jitsu is different from most sports in one important way: the forces on your joints are unpredictable. Your opponent isn’t a barbell. They move, shift weight, and apply leverage in directions you can’t always anticipate. Your neck takes torque during scrambles. Your shoulder gets stretched in awkward positions during guard passing. Your low back absorbs compression from being stacked. Your knees get twisted during leg entanglements.
Standard gym training doesn’t fully prepare you for this. A shoulder press makes you stronger in a fixed plane. BJJ puts your shoulder capsule through 360 degrees of potential stress. That gap — between what normal training builds and what jiu jitsu demands — is where injuries happen.
My Approach: 15-Minute Supersetting Prehab Sessions
I keep my prehab sessions short on purpose. Fifteen minutes, supersetting two movements back to back. For example: neck strengthening with the Iron Neck harness, then immediately into external shoulder rotations with a resistance band. Rest, repeat.
This keeps the work density high without adding a ton of time to my day. I do this three to four times per week, usually before a training session or on off days. It’s not glamorous, but it’s the most consistent I’ve ever been with this kind of work — and I can feel the difference on the mat.
Key Factors to Consider for BJJ Injury Prevention
Neck Strength Is Non-Negotiable
I’ll be honest — I didn’t take neck training seriously until I started getting caught in more chokes and feeling it the next day. A stronger neck does two things for you: it protects you during scrambles and impacts, and it buys you a few extra seconds when someone’s trying to finish a choke. I won’t pretend that second benefit is the noble reason to train your neck, but it’s real.
Shoulder Capsule Health, Not Just Shoulder Strength
There’s a difference between having strong shoulders and having healthy shoulder capsules. Most BJJ injuries I’ve seen in training partners involve the capsule — the connective tissue around the joint — not the big muscle groups. External rotation work with bands is the most underrated shoulder exercise for grapplers. It directly targets the rotator cuff in a way that pressing movements don’t.
If you’re just getting started in no-gi, having the right gear also helps prevent injuries — check out our no-gi BJJ gear guide for what to wear on your first day.
Knee Health Requires Targeted Work
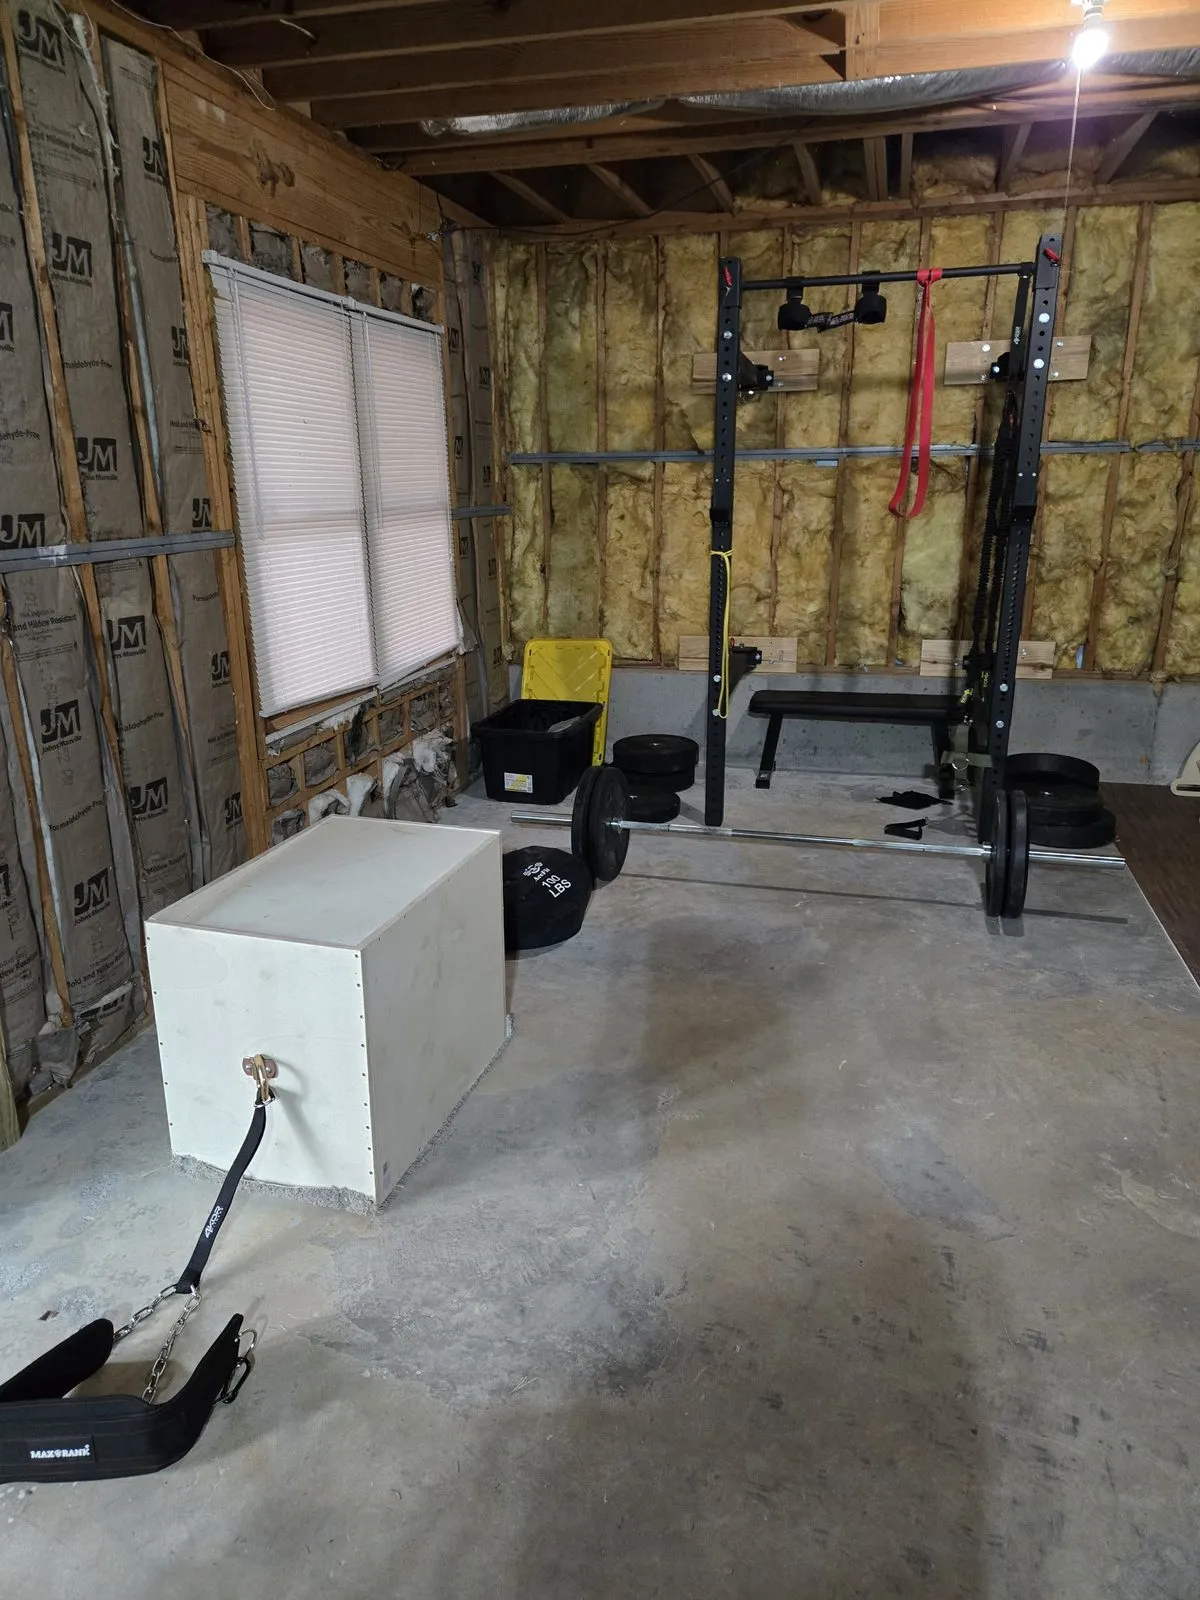
Knees in BJJ take a beating from guard work, takedowns, and ground positions. The reverse sled pull is the single best exercise I’ve found for knee health — specifically for building the VMO (the teardrop muscle above the kneecap) and for people dealing with patellar tendonitis. I built a DIY plywood sled specifically to do these, and it’s one of the better decisions I’ve made for my training longevity.
Train Stabilizer Muscles, Not Just Prime Movers
Jiu jitsu demands strength in unstable, awkward positions. A sandbag addresses this in a way a barbell never will — the shifting weight forces your stabilizers to engage constantly. When I’m wrestling a 100-pound AceFit sandbag around my garage floor, it’s not pretty, but it’s a lot closer to what grappling actually feels like than a clean deadlift.
Our Recommendations: The Gear I Actually Use
Here’s a breakdown of everything in my current prehab setup, what it costs, and exactly how I use it.
| Product | Price | Rating | Primary Use | Best For |
|---|---|---|---|---|
| WSAKOUE Resistance Bands | $25–35 | ★★★★ | Shoulder/hip mobility | Stretching, external rotations |
| 4KOR Fitness Resistance Bands | $15–25 | ★★★★ | Shoulder + neck work | Band-resisted exercises |
| Iron Neck Alpha Harness | $54–65 | ★★★★½ | Neck strengthening | Direct neck prehab |
| Iron Neck 3.0 | $349 | ★★★★½ | Neck strengthening | Premium 360° neck training |
| Grip Power Pads Lifting Hooks | $25–26 | ★★★★ | Dead hangs | Shoulder capsule mobility |
| MAXRANK Dip Belt | $22–30 | ★★★★½ | Weighted dead hangs + sled | Knees + shoulder decompression |
| AceFit Sandbag 100 LB | $50–80 | ★★★★ | Loaded carries, awkward movement | Full-body stabilizer work |
1. WSAKOUE Pull Up Resistance Bands Set ($25–35)
These are my most-used piece of equipment. I have them attached to my rig almost permanently. The main way I use them for shoulder health is single-arm lat pulls — get one arm in the band, step away from the rig, and let it pull your lat into a deep stretch. For guys with tight lats and internal shoulder rotation issues (common in grapplers), this is immediately noticeable.
I also use the lighter bands for external shoulder rotations, and for hip opening in different positions — both things that carry directly to guard work and scrambles.
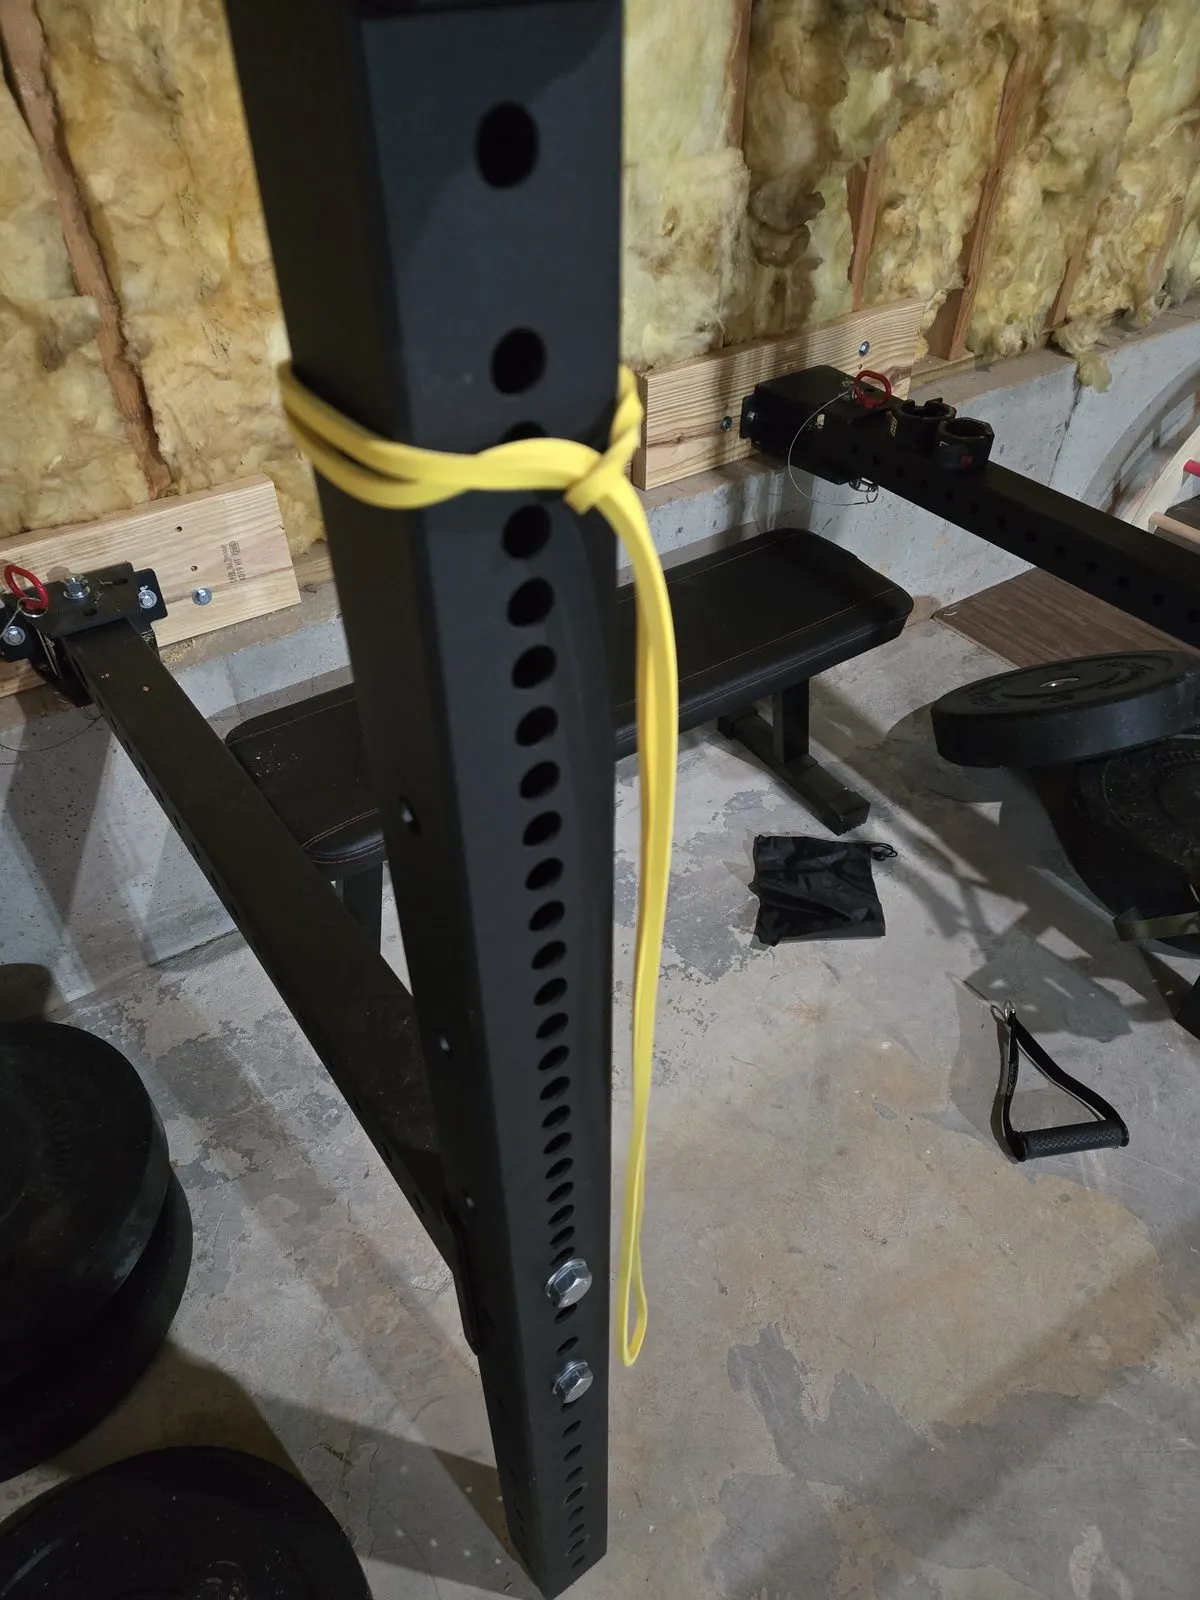
The drawback: the bands can roll or twist on the rig attachment point, which is mildly annoying. Not a dealbreaker, but worth knowing.
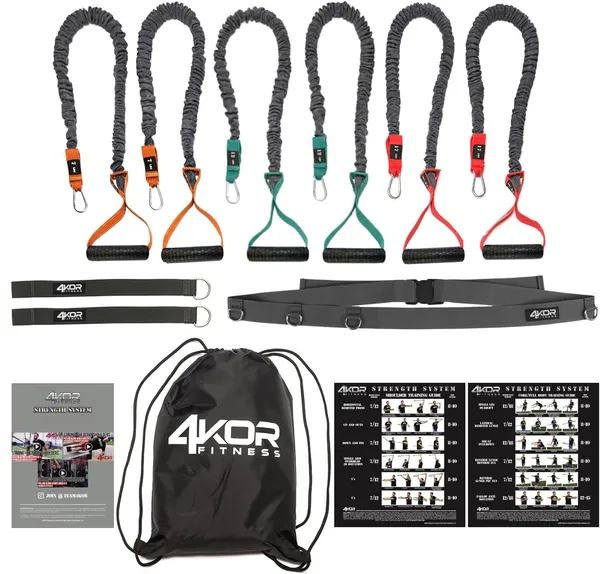
2. 4KOR Fitness Resistance Bands ($15–25)
Where the WSAKOUE bands are my go-to for stretching and hip work, the 4KOR bands are what I reach for when I’m doing resistance-based shoulder movements — face pulls, external rotations, pull-aparts. They also connect directly to the Iron Neck Alpha Harness, which makes them essential for my neck training circuit.
The tension options on this set are good, and the build quality has held up well. My only complaint is that the shorter loop bands can snap back if you lose your grip, which is startling and occasionally leaves a mark.
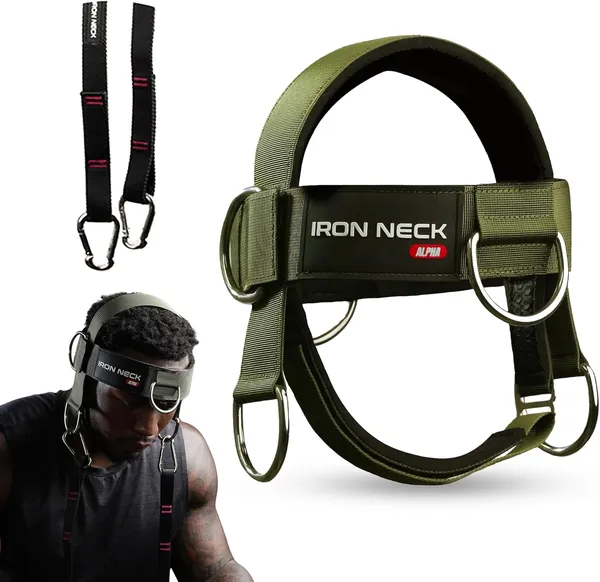
3. Iron Neck Alpha Harness ($54–65)
This is the one piece of gear I recommend most aggressively to older grapplers. The Iron Neck Alpha is a padded harness that fits over your head with a front attachment point — you connect it to a band or cable and do neck flexion, extension, and lateral movements under resistance.
I use it two to three times per week, pairing it with band work as a superset. The results after a few months are real — my neck feels more stable during training, and I recover faster after hard rolls.
The honest downside: $54–65 is the most expensive item in this guide by a clear margin, and there’s a learning curve to using it correctly. Form matters, and going too heavy too fast is a bad idea. Start light.
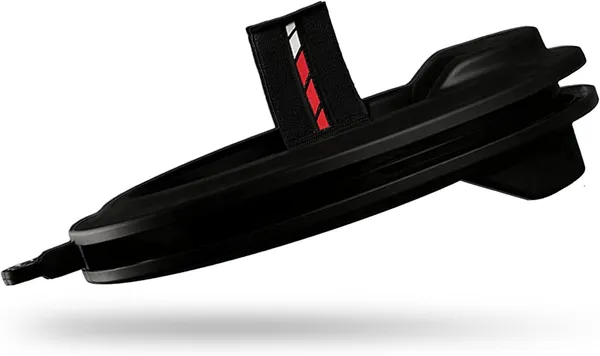
The Premium Upgrade: Iron Neck 3.0 ($349)
If you’re serious about neck training and want the best tool that exists for it, the Iron Neck 3.0 is it. I’ve used a training partner’s and it’s a significant step up from the Alpha Harness. Instead of a simple head harness with a band attachment, the 3.0 is a full rotational device that sits on your head with an inflatable air bladder for a custom fit. It provides 360-degree isometric resistance, which means you can train neck strength in every direction — flexion, extension, lateral, and rotation — in a single fluid movement.
The difference you feel immediately is how smooth and controlled the resistance is compared to a band setup. The Alpha Harness gets the job done on a budget, but the 3.0 is what physical therapists and pro athletes use. It comes with a 25 lb resistance band, interchangeable padding in three sizes, and multiple anchor options (door, belt, cinch).
I haven’t bought one myself yet — $349 is a real investment — but after using one, it’s at the top of my wish list. If neck health is a priority for you and budget isn’t the constraint, skip the Alpha and go straight to this.
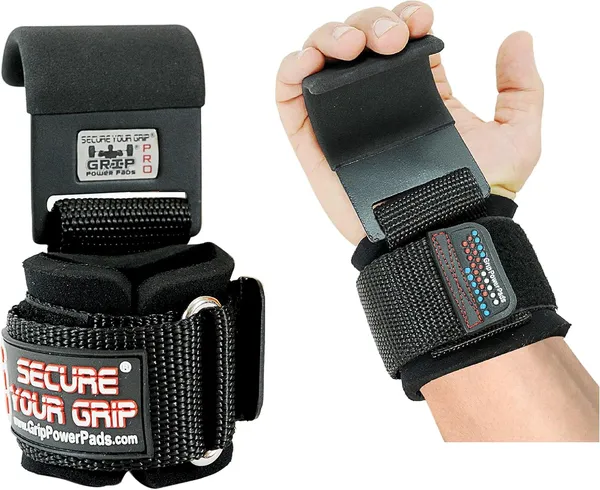
4. Grip Power Pads Heavy Duty PRO Lifting Hooks ($25–26)
I use these almost exclusively for dead hangs from my pull-up bar. The reason I needed them: when doing extended dead hangs for shoulder decompression, grip fatigue was always the limiting factor. My shoulders needed more time hanging than my grip could handle. The lifting hooks solve that completely — I can hang for 60–90 seconds without thinking about my grip at all.
Dead hangs are underrated for shoulder health. They decompress the shoulder capsule, stretch the lats, and improve shoulder flexion. Combined with the weighted dead hangs I do with the dip belt, this is a cornerstone of my shoulder prehab.
Drawback: these are slightly bulky and the wrist strap can feel stiff initially. They break in after a few sessions.
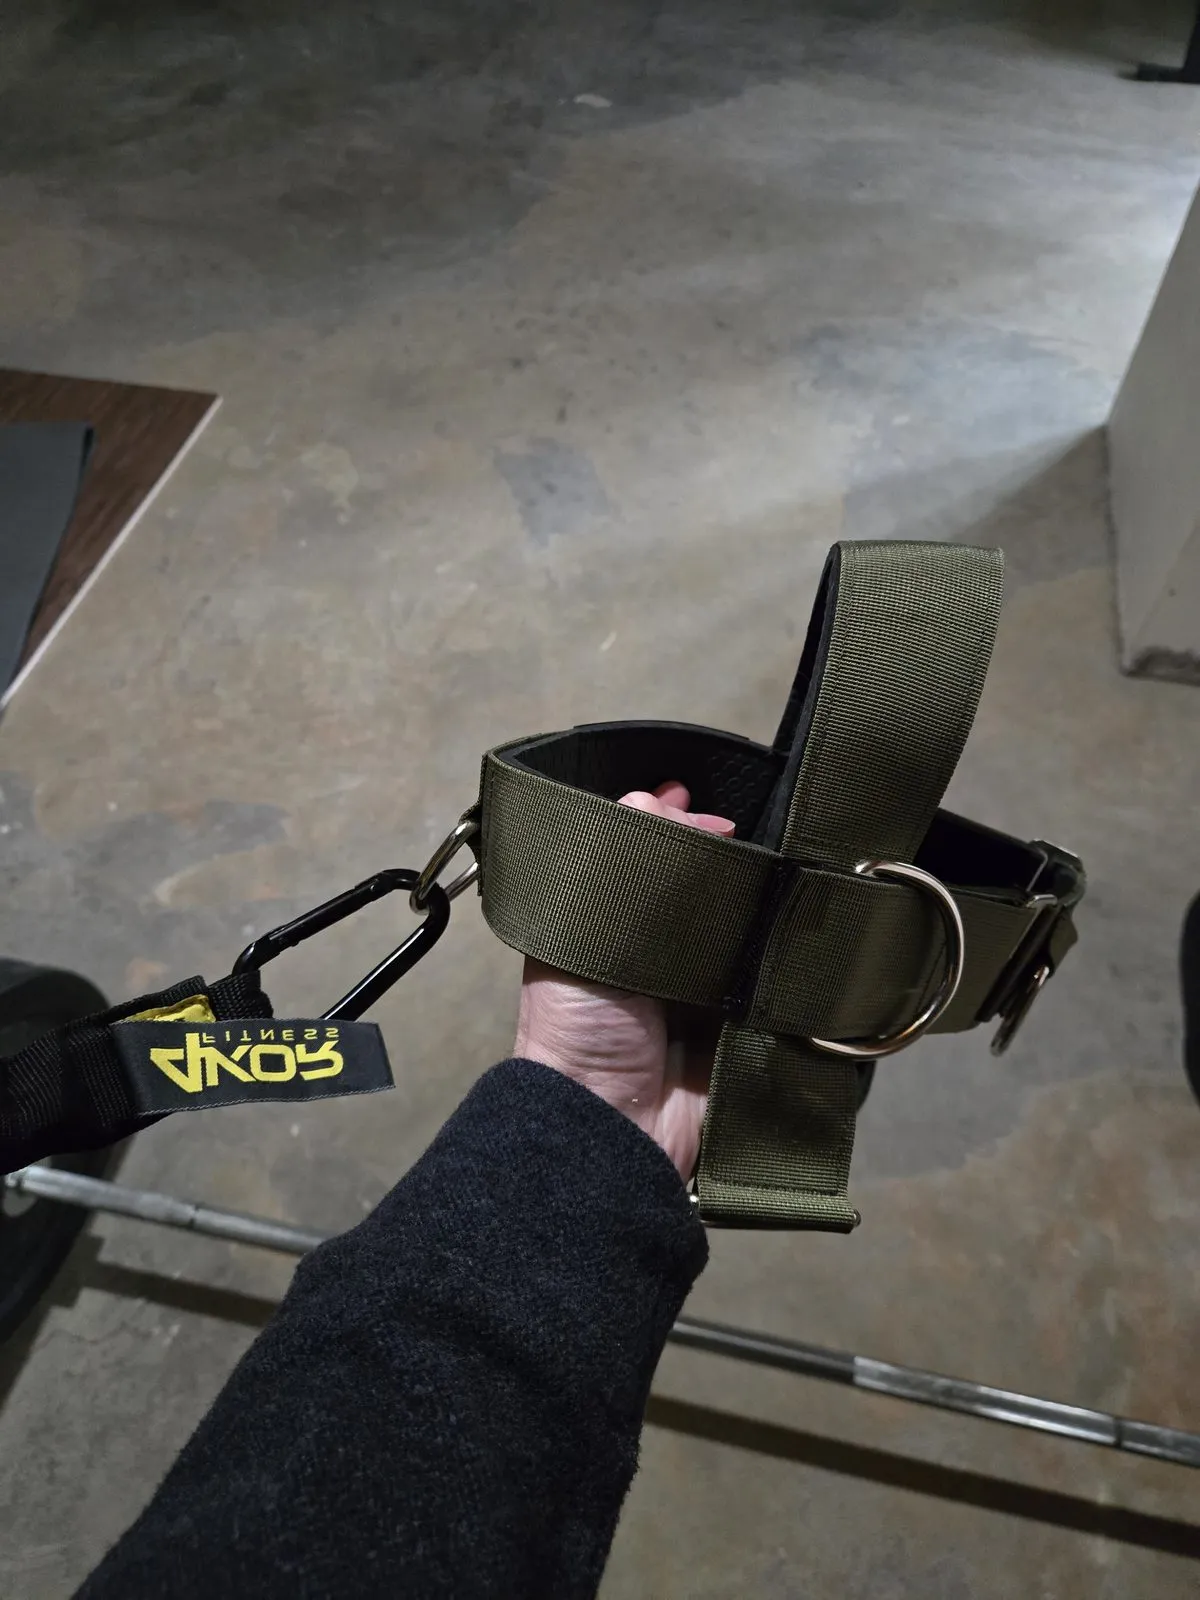
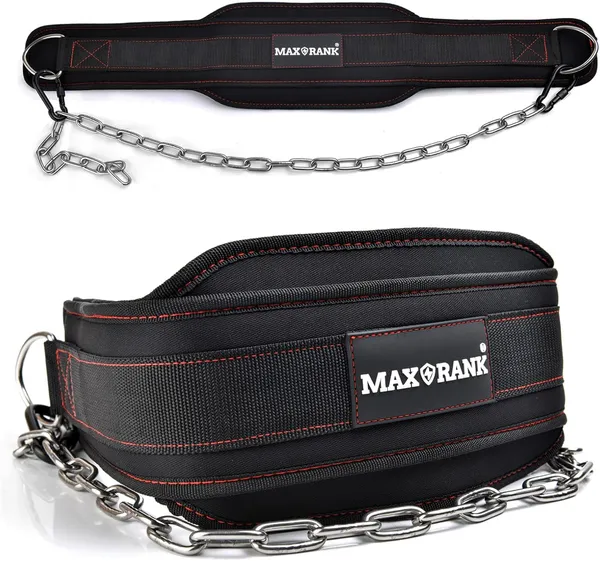
5. MAXRANK Dip Belt ($22–30)
The dip belt serves double duty in my training. First, I use it for weighted dead hangs — clip a small plate or kettlebell to the belt and hang from the bar. The added weight increases the decompression effect on the shoulder capsule noticeably.
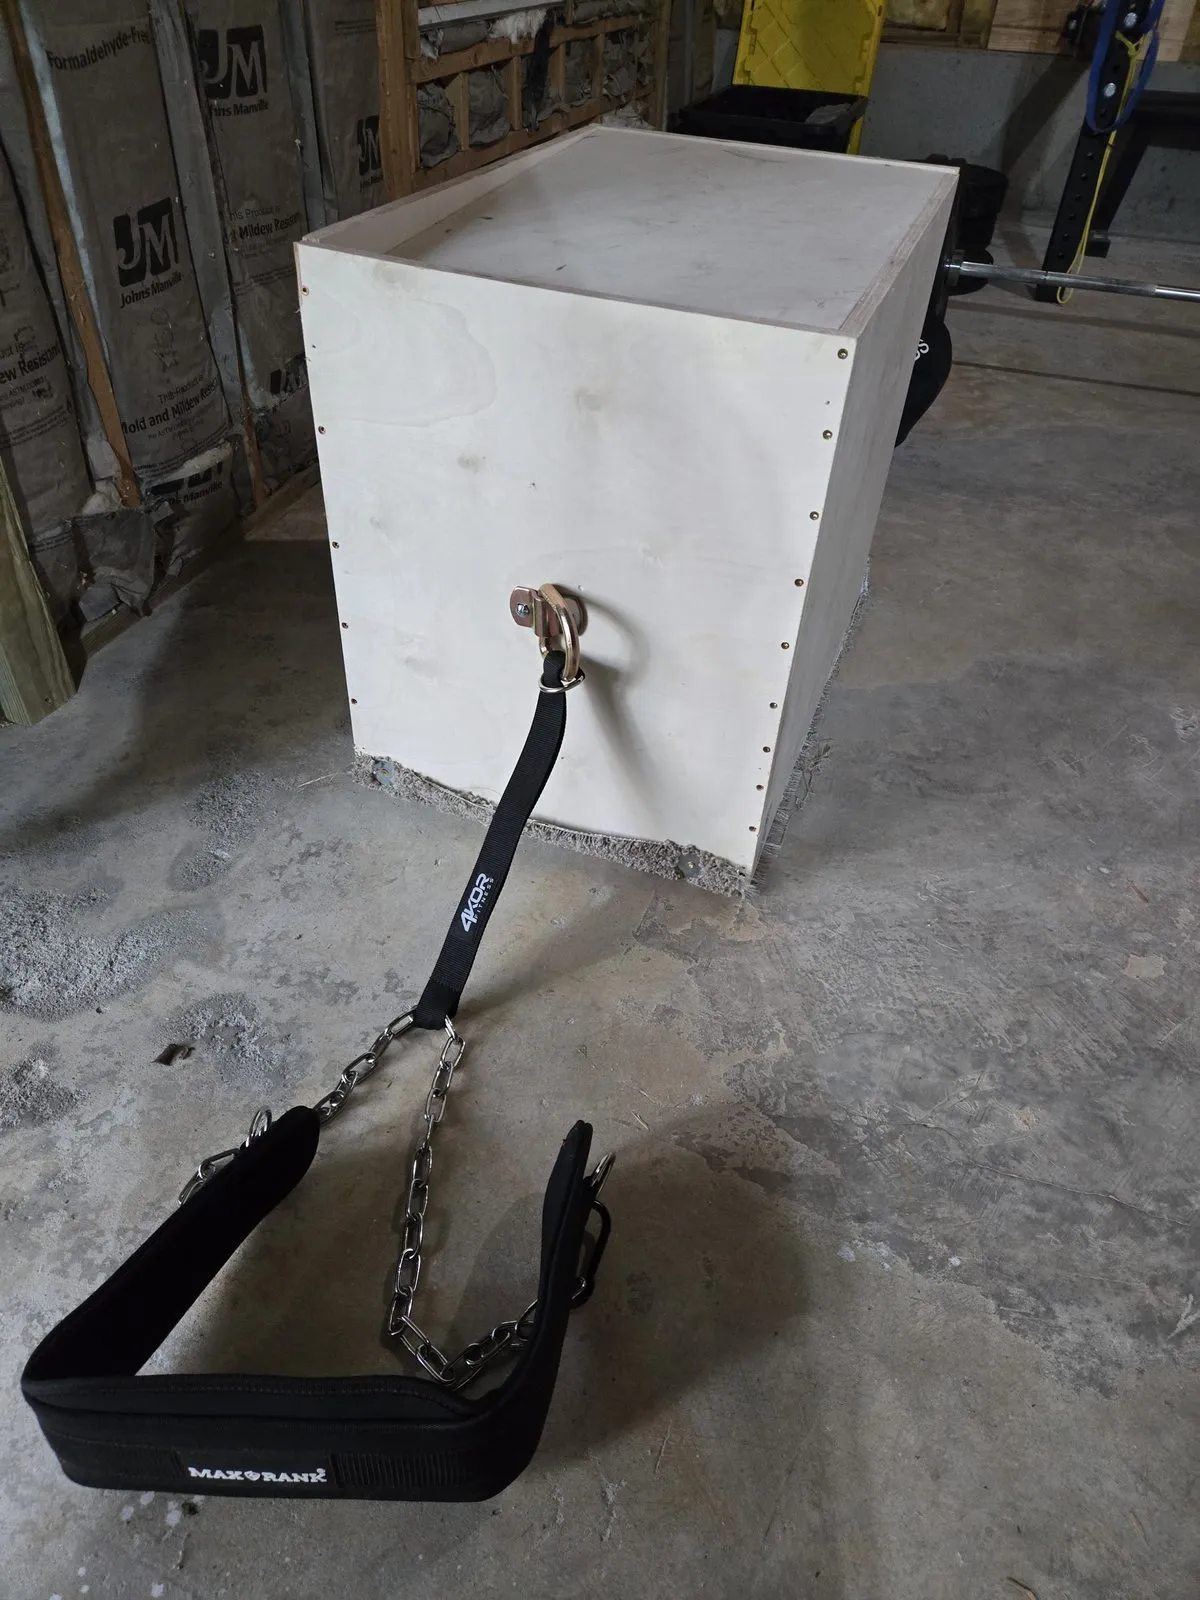
Second, and this might be the highest-value use in this whole guide: reverse sled pulls for knee health. I built a simple sled out of plywood with a D-ring attached to it. I clip the dip belt chain to the D-ring, load the sled with weight plates, and walk backwards. It’s low-impact, it directly targets the VMO, and research on patellar tendonitis rehabilitation consistently points to this movement as one of the best options.
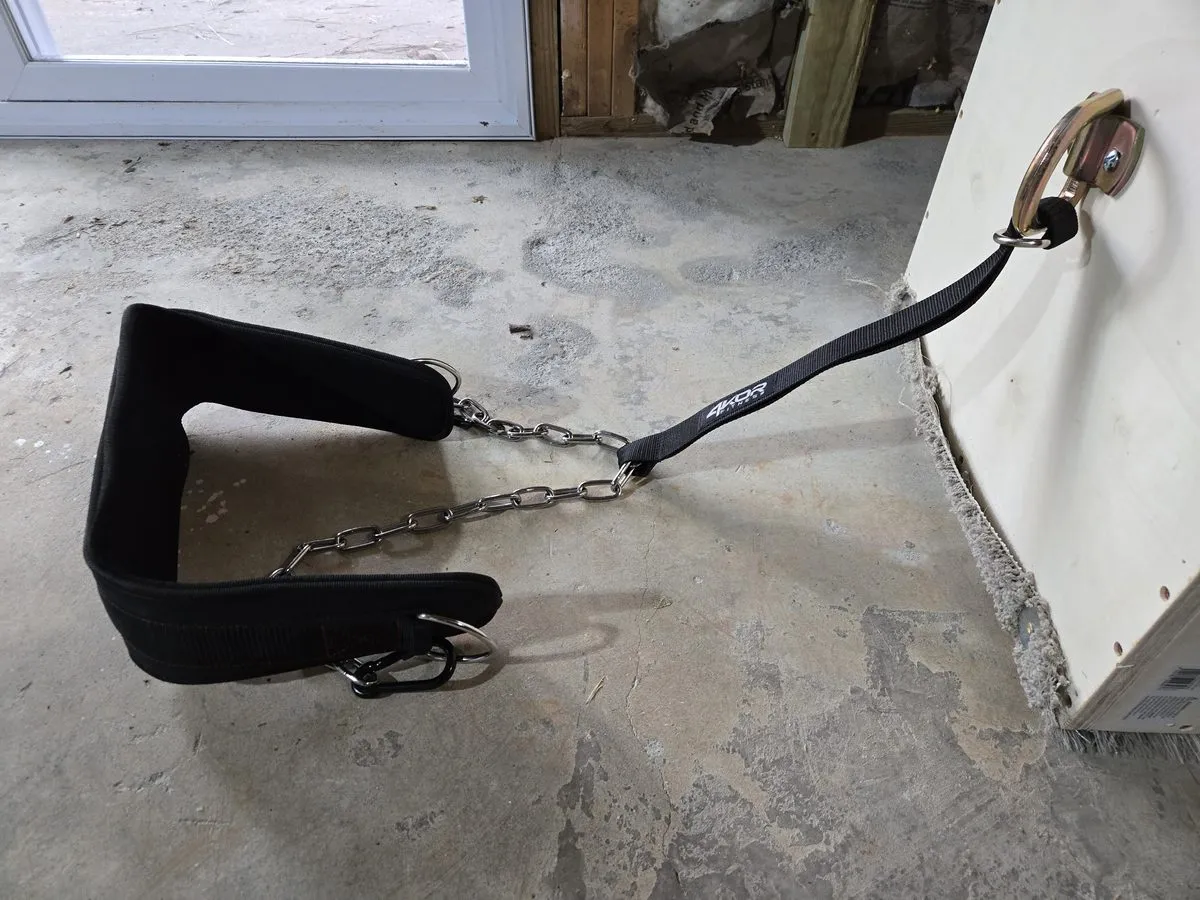
The MAXRANK belt itself is solid. The chain is heavy-duty. My only note is that the padding is minimal, so if you’re loading it heavy for weighted dips, it can dig in. For my uses, it’s been fine.
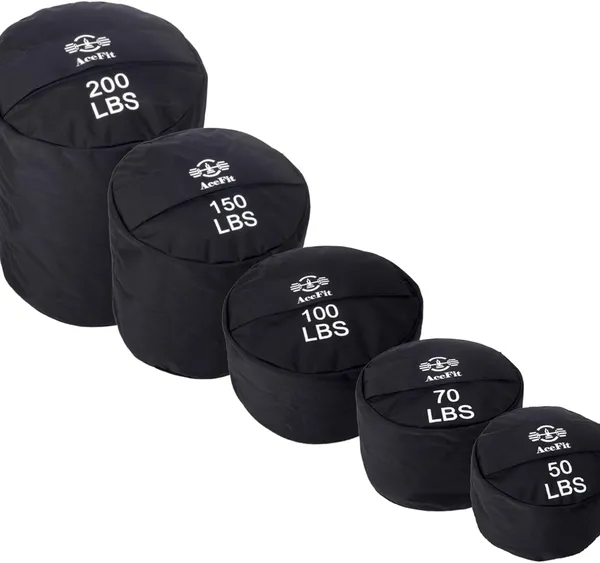
6. AceFit Training Sandbag — 100 LBS ($50–80)
I’ll be real — dragging a 100-pound sandbag around your garage is humbling. The shifting sand inside means the weight is never the same twice. That’s the whole point. Jiu jitsu doesn’t give you predictable resistance, and this sandbag trains your body to generate force in unstable, awkward positions the same way.
I use it for bear hug carries, shouldering, and dragging — all movements that mimic the demands of actual grappling better than most barbell exercises. My stabilizers get lit up in a way that traditional lifting doesn’t produce.
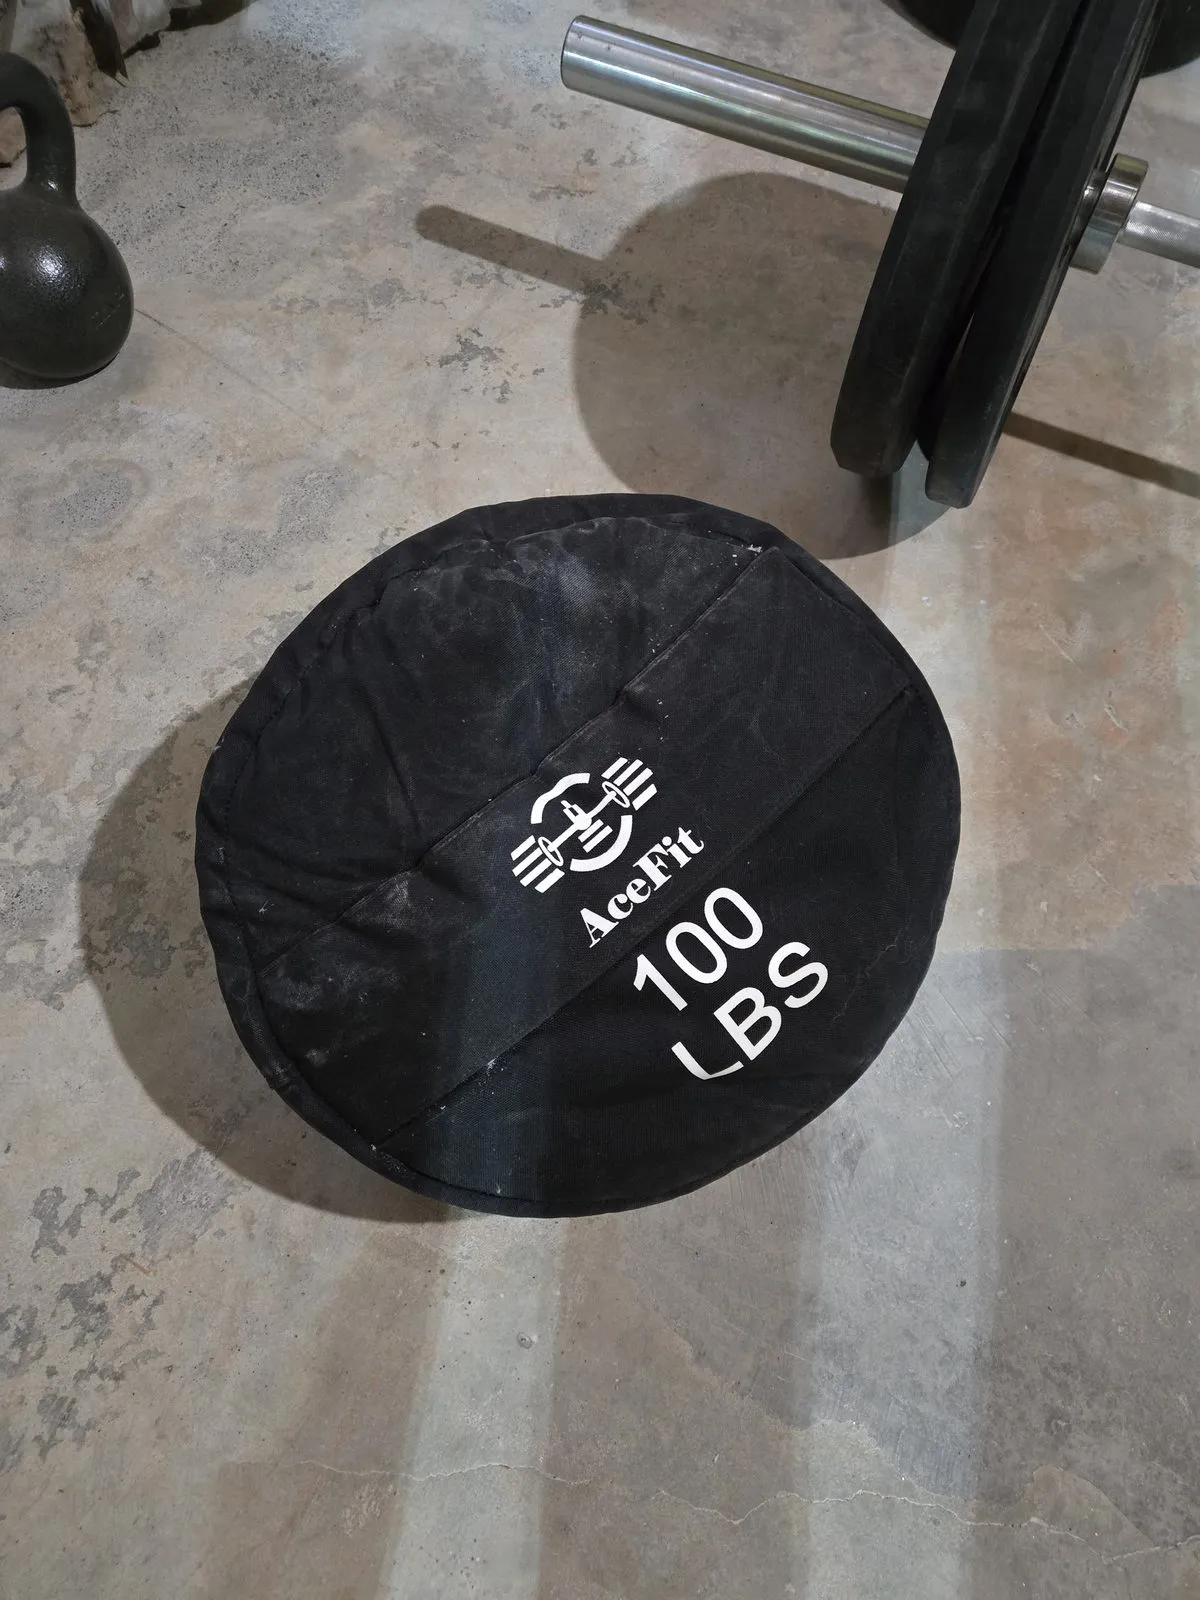
The drawback is practical: 100 pounds of sandbag takes up significant floor space, and filling it correctly (with internal bags to manage the shifting) takes some initial setup. The AceFit comes with filler bags, which helps. Also worth noting — start lighter than you think you need to. This thing will humble you fast.
The DIY Sled
I want to give this its own mention because it’s not a product you buy — it’s a project worth doing. I built mine from a piece of plywood, a D-ring bolt, and a few hours on a Sunday. Total cost was maybe $15 in hardware. I load it with standard weight plates and connect it to the MAXRANK dip belt for reverse sled pulls.
If you’re dealing with knee issues, patellar tendonitis specifically, or just want a low-impact way to build quad strength without axial loading, this is the move. Backwards sled pulls have become a staple for me.
Sample Prehab Supersets
Here’s what a typical 15-minute session looks like for me:
Pairing A — Neck + Shoulder Capsule
- Iron Neck Alpha: 3 sets of 10 reps each direction
- Band External Rotations (4KOR): 3 sets of 15 reps per arm
Pairing B — Shoulder Decompression + Knee
- Weighted Dead Hang (Grip hooks + Dip belt): 3 x 45–60 seconds
- Reverse Sled Pull (DIY sled + Dip belt): 3 x 30 meters
Pairing C — Mobility + Stability
- Lat Band Stretch (WSAKOUE): 3 x 30 seconds per arm
- Sandbag Bear Hug Carry: 3 x 20 meters
Frequently Asked Questions
Is BJJ safe for people over 40?
Yes, with the right preparation. The injury rates in BJJ are comparable to other contact sports, and the biggest risk factor isn’t age — it’s training without prehab. A consistent 15-minute prehab routine targeting neck, shoulders, and knees makes a significant difference. I train regularly as an older grappler and the key is treating injury prevention as seriously as the training itself.
What is the most common BJJ injury?
Shoulder injuries top the list, followed by knees, neck, and low back. Most shoulder injuries involve the capsule and rotator cuff rather than the big muscle groups, which is why external rotation work with bands matters more than pressing movements for BJJ-specific prehab.
How do you prevent knee injuries in BJJ?
Reverse sled pulls are the best exercise I’ve found — they directly target the VMO muscle and are excellent for patellar tendonitis prevention. I built a DIY plywood sled for about $15 and use it with a dip belt. The movement is low-impact, high-reward, and specifically addresses the knee demands of guard work and takedowns.
How do you strengthen your neck for BJJ?
The Iron Neck Alpha Harness is the most effective tool I’ve used. It provides resistance through flexion, extension, and lateral movements. I do 3 sets of 10 reps in each direction, 2-3 times per week. Start with light resistance — going too heavy too fast on neck work is a bad idea. A stronger neck protects during scrambles and buys time in choke defense.
Bottom Line
BJJ injury prevention for older grapplers comes down to one thing: consistent, targeted work on the specific areas jiu jitsu breaks down. Here’s how I’d approach the gear based on your situation:
-
If you only buy one thing: Get the Iron Neck Alpha Harness. Neck injuries in BJJ are serious, and nothing else in this guide has a higher return on investment for staying safe on the mat.
-
If budget is tight: The WSAKOUE or 4KOR bands at $15–35 give you the most versatility per dollar. You can address shoulders, hips, and even neck work (with the 4KOR + harness combo) from a single purchase.
-
If your knees are the issue: Build the plywood sled — it costs almost nothing — and pair it with the MAXRANK dip belt. Reverse sled pulls have been the most impactful thing I’ve done for knee health.
-
If you want to train more like BJJ feels: The AceFit sandbag is the most sport-specific piece of equipment here. It trains the stabilizer engagement and awkward-position strength that grappling demands in a way nothing else does.
For grip-related issues from gi training or pull-ups, our CrossFit grips guide covers hand protection that carries over to grappling.
None of this is complicated. It’s 15 minutes, a few times a week, with inexpensive equipment. The payoff is measured in years of training you don’t miss because you’re sitting on the sidelines hurt. That math is pretty easy for me.
Products Mentioned in This Article
WSAKOUE Pull Up Resistance Bands Set
Versatile resistance band set ideal for shoulder stretching, lat pulls, and hip mobility work.
- Great for single-arm lat pulls and deep shoulder stretches
- Multiple resistance levels for different exercises
- Useful for both shoulder and hip mobility work
- Bands can roll or twist on the rig attachment point
- Requires a pull-up rig or anchor point to get full use
4KOR Fitness Resistance Bands
Durable resistance bands designed for face pulls, external rotations, and neck harness attachment.
- Good tension options for resistance-based shoulder movements
- Connects directly to the Iron Neck Alpha Harness for neck training
- Solid build quality that holds up well over time
- Shorter loop bands can snap back if you lose your grip
- Less ideal for stretching compared to longer band sets
Iron Neck Alpha Harness
Padded head harness with front attachment point for targeted neck flexion, extension, and lateral training.
- Highest-impact single piece of prehab gear for BJJ
- Noticeable neck stability improvement after a few months of use
- Pairs perfectly with resistance bands for superset prehab sessions
- Most expensive item in a basic prehab setup
- Learning curve to using it correctly — form matters and going too heavy too fast is risky
Iron Neck 3.0 Neck Trainer
Premium 360-degree rotational neck trainer with inflatable air bladder used by physical therapists and pro athletes.
- Smooth, controlled 360-degree isometric resistance in every direction
- Inflatable air bladder provides a custom fit
- Significant step up from the Alpha Harness in training quality
- Includes 25 lb resistance band and multiple anchor options
- At $349, it is a serious investment
- Overkill for casual grapplers who train infrequently
Grip Power Pads Heavy Duty PRO Lifting Hooks
Heavy-duty lifting hooks that eliminate grip fatigue during extended dead hangs for shoulder decompression.
- Allows 60-90 second dead hangs without grip being the limiting factor
- Essential for getting full shoulder decompression benefit from hanging
- Durable construction that handles daily use
- Slightly bulky design
- Wrist strap feels stiff initially and needs a few sessions to break in
MAXRANK Dip Belt
Versatile dip belt with heavy-duty chain for weighted dead hangs and reverse sled pulls.
- Serves double duty for weighted dead hangs and reverse sled pulls
- Heavy-duty chain connects easily to sleds and weight plates
- Excellent value at $22 for a cornerstone prehab tool
- Minimal padding that can dig in during heavy weighted dips
- Chain can be noisy on hard floors
AceFit Training Sandbag 100 LB
100-pound sandbag with shifting fill that trains stabilizer muscles in unpredictable positions like grappling.
- Shifting sand mimics the unpredictable resistance of grappling
- Great for bear hug carries, shouldering, and dragging
- Comes with filler bags for easier setup
- Takes up significant floor space at 100 pounds
- Initial filling and setup takes time to get right
- Start lighter than you think — 100 lbs is humbling